Building a Workflow
The basic process of building a workflow is as follows:
- Define and configure the relevantAction Requestnodes
- ‘Right-click’ on the canvas to access node options.
- Select the relevantnodes.
- Connect additional information to nodes.
Example: Basic approval workflow
As an example, we will build a workflow with two nodes: a "For Approval" node with a loop back to a "For Correction" node.
Basic approval workflow
In Docwize, this flow (above) looks like this:
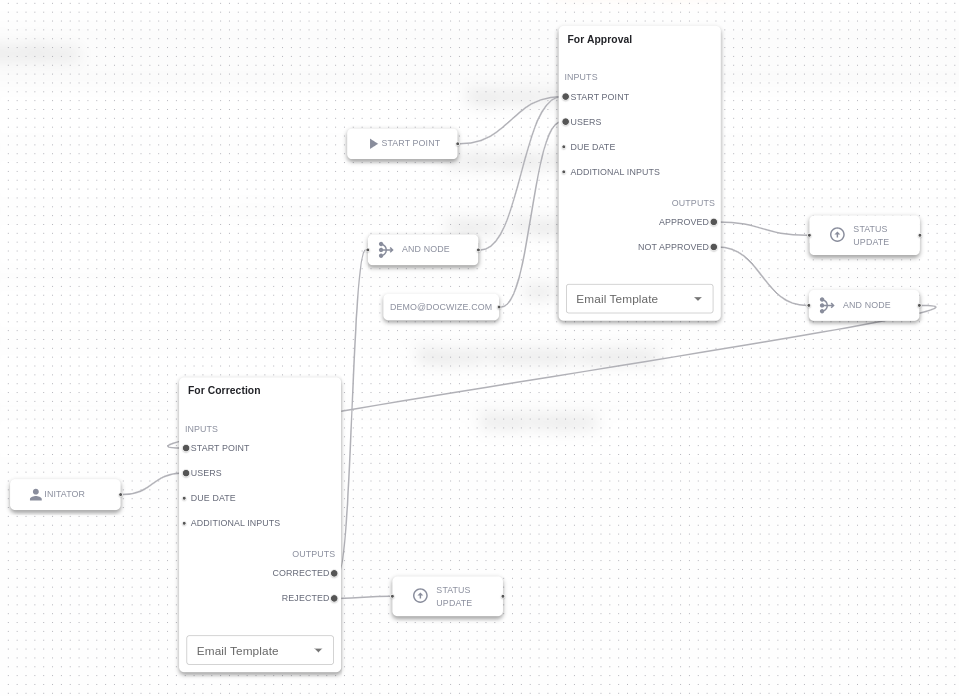
Example: Basic Approval Workflow
A document starts at the Start node. It then moves to the For Approval stage, where the assigned user reviews the document. In this example, the assigned user is demo@docwize.com. If the document is approved, it proceeds to the Status Task node, updating the Document status to 'Approved', reflecting the action reply option that was selected.
If the document is not approved, it follows the path to the For Correction cycle. It is sent back to the initiator, who makes the required corrections. Once corrected, the document is sent back to the 'For Approval' flow for re-evaluation. The process repeats until the document is either approved or rejected. The For Correction node will flag the document's status as 'Rejected' if that option is chosen.
Email notifications are sent to relevant participants at key points to ensure they are kept up-to-date on the status of the process.
Example: Building a 'For Approval' workflow
Workflow Sections
Users can label portions of a workflow, namely creating workflow sections. A section indicates that a set of action nodes belong together. In more complex workflows, this can be a helpful feature to keep track of the process on a meta-level. For example, one section might be labeled 'Internal Review', while another is labeled 'External Review'. If, for instance, the same action requests appear in both sections, the distinct sections labels bring clarity as to the current phase of a document in a workflow. Created section labels can be edited and/or deleted.
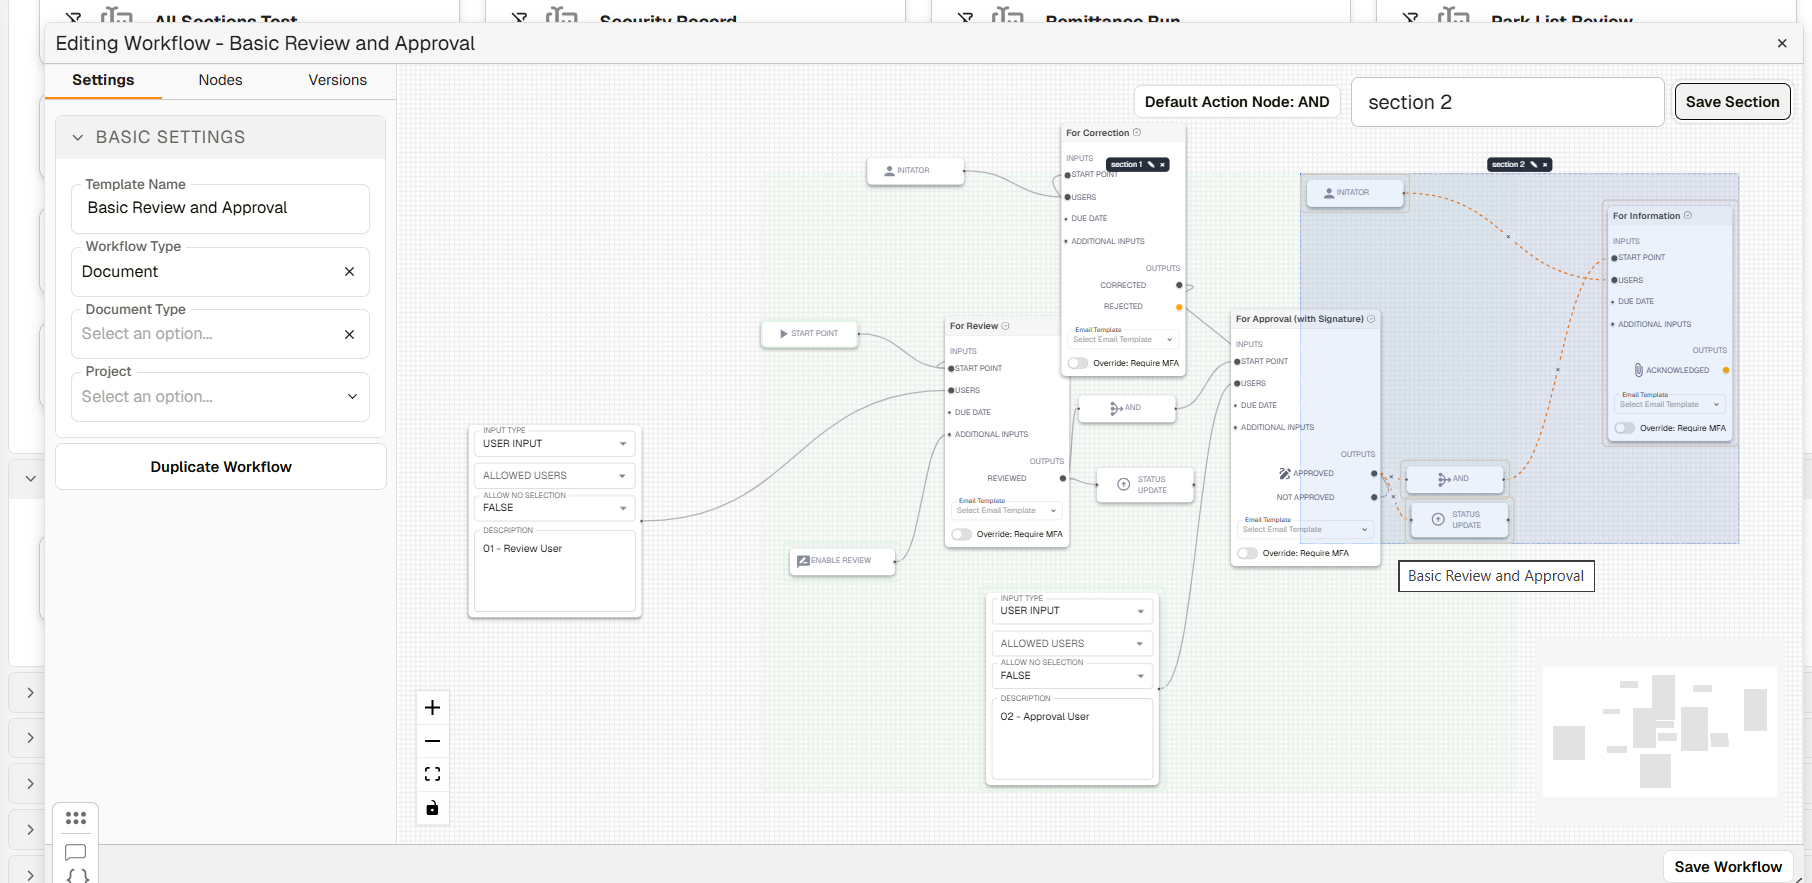
Example: Workflow Template with Section
| Field | Description |
|---|---|
| Blue area | Workflow section. |
| Section Label | Place to input section name. |
| Save Section | Saves the created section name. |
How to Add a Workflow Section
| Step | Description |
|---|---|
| 1 | Navigate to the Template section for workflows and open the relevant workflow template. |
| 2 | Hold 'Shift' and select the relevant section of the workflow by clicking. A blue section will appear. |
| 3 | Input the section name in 'Section Label' and click 'Save Section'. |
Example: Creating a Workflow Section