'Manage Registers' Interface
Docwize users can view or edit many-to-many custom fields from the 'Manage Registers' interface. For example, users may want to edit an employee register, add items to an asset register or update a risk register's criteria.
This feature is located under the ‘New’ module, under the 'Custom Fields'section.

'Manage Registers' Icon
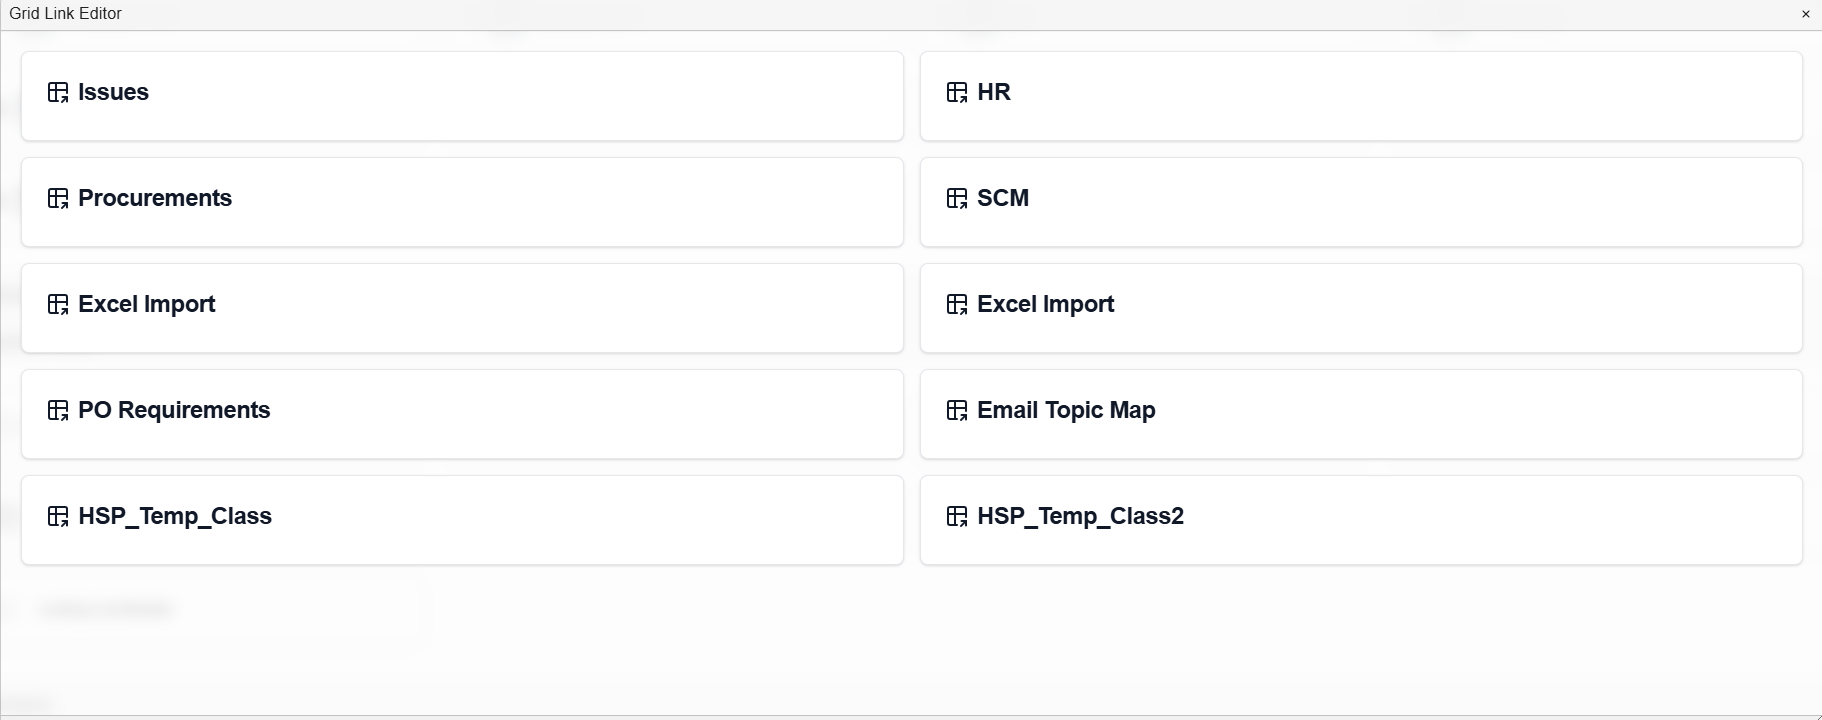
Example: 'Manage Registers' interface
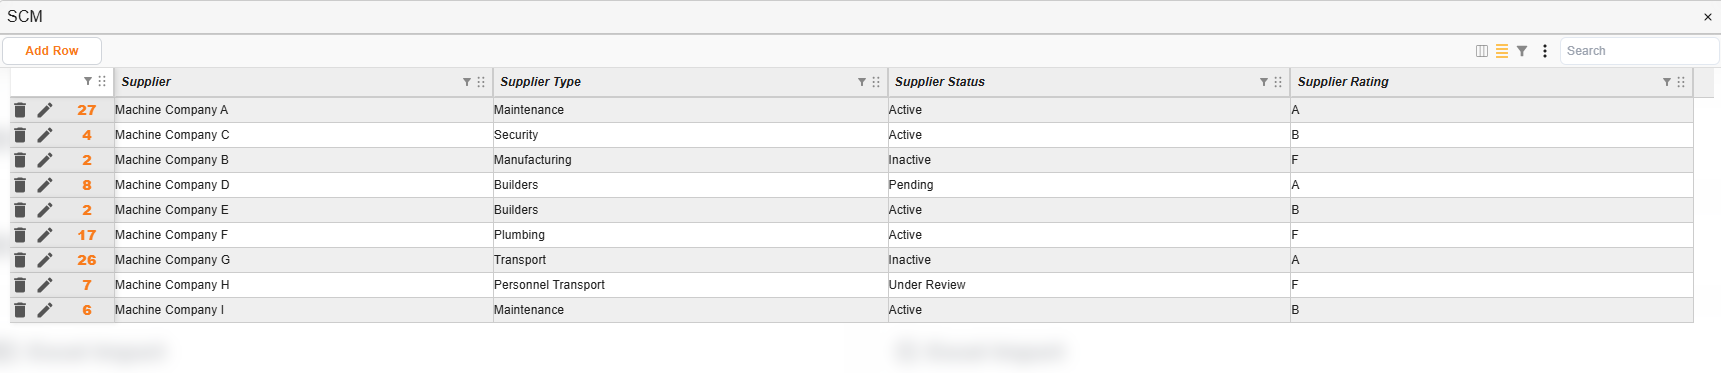
Example: Register
When a user clicks on one of the created registers, the dialog that appears lists the following options:
| Field | Description |
|---|---|
| Add Row | Navigates a dialog with the fields of the relevant register for populating a new row in the register. |
 | Enables a user to delete a row in the register. |
 | Enables a user to edit a row’s information. |
| Orange Number (varies) | Enables a user to access any documents linked to a row in the register, when applicable. |
How to Create a Register
| Step | Description |
|---|---|
| 1 | Go to ‘New’ – 'Custom Fields' section and click on 'Custom Fields'. |
| 2 | Create a new ‘Custom Field' template. |
| 3 | Select ‘Gridlink’ for the ‘Template Type’. |
| 4 | Add relevant fields for input in the register, and save the template. See Create New Custom Field Template for more detailed instructions. Note: The created custom field template will now appear under ‘Manage Register’. |
How to Add Rows to a Register
| Step | Description |
|---|---|
| 1 | Navigate to the ‘Manage Register’ section. |
| 2 | Select the relevant register. |
| 3 | Click on ‘Add row’ and complete the relevant fields, saving changes. |
| 4 | Add as many rows as required. |
How to Import a Register
| Step | Description |
|---|---|
| 1 | Go to ‘New’ – ‘Custom Fields’ – ‘Create New Template’. (See Create New Custom Field Template for more detailed instructions.) Complete the metadata related to the custom field (eg. give it a name, select the type of custom field.) NOTE: Select 'Gridlink' for template type. |
| 2 | In the top right corner of the Custom Field Template dialog, click on the ‘Auto Import Columns’ icon. |
| 3 | ‘Drag and drop’ the relevant excel sheet for importing, and follow the dialog’s prompts, selecting the sheet(s) and field(s) you want to import. Import the excel. |
| 4 | The imported fields will appear in the Custom Field template. Important: Check that the field types for the imported fields are accurate. (For example, if a field is for a ‘date’, ensure that the data type selected is ‘date’, not ‘free text’, etc.) |
| 5 | Click 'Save'. |
| 6 | Navigate to 'New' - 'Custom Fields' - 'Manage Registers'. Select the relevant register; it will share the name of the Custom Field template you created. |
| 7 | Click on the 3 dots in the top right corner and select ‘Import Data’. |
| 8 | Select the relevant sheet(s) from the horizontal toolbar at the bottom of the dialog. |
| 9 | Select the row(s) you want to import using the tick box to the left of the rows. |
| 10 | Pin the header. |
| 11 | Select ‘Finish’. |
| 12 | Map the columns. The importer will assist by matching to what is most likely. Review and revise, as needed. |
| 13 | Validate the mapping and proceed. NOTE: if a row is light red, the import will fail. If it is dark red, it indicates there is an error. The row is is editable. When a row is green, it will import. Only valid rows will be imported. |
Example: Importing a Register