Manage Lists
Docwize users can view, add or edit lists relevant to their database by means of the ‘Manage Lists’ section. The ‘Manage Lists’ section is found in ‘New’ under 'Custom Fields and Configurations'.
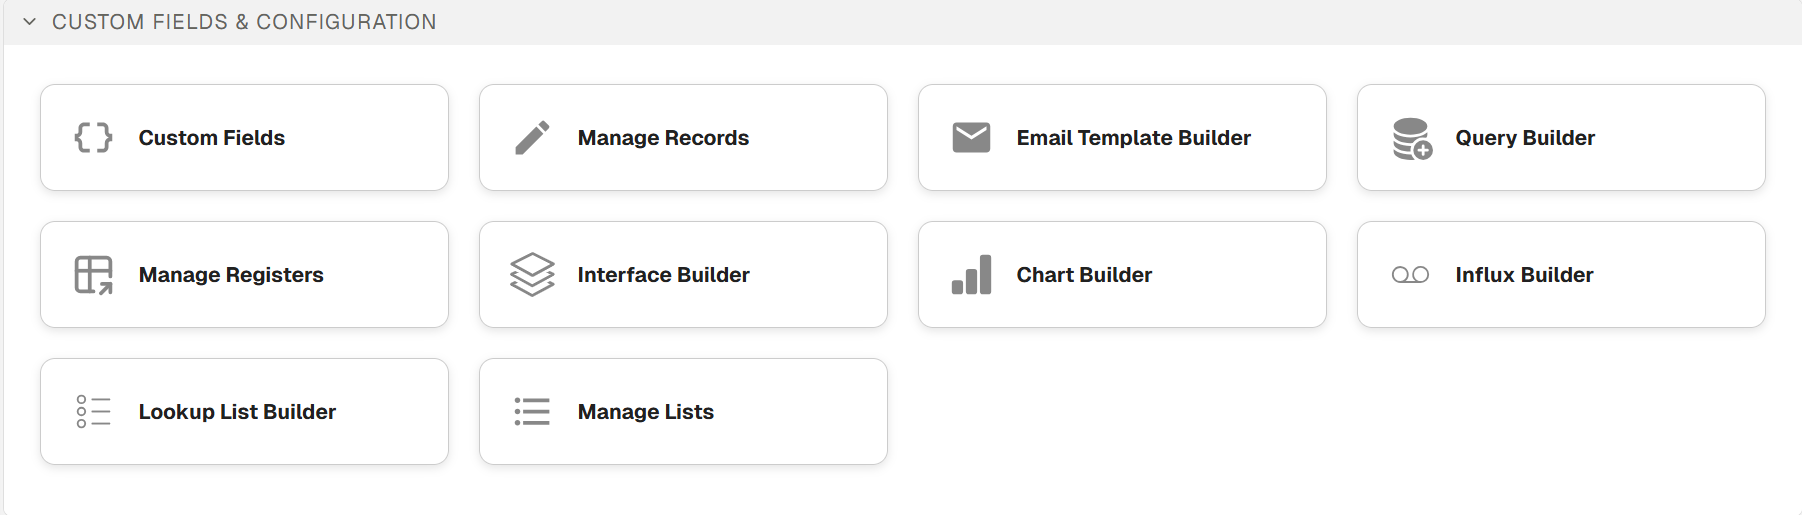
'Custom Fields and Configurations' section
'Manage Lists' button
When a user clicks on the ‘Manage Lists’ icon, the ‘List Manage’ dialog appears.
List Manage Dialog
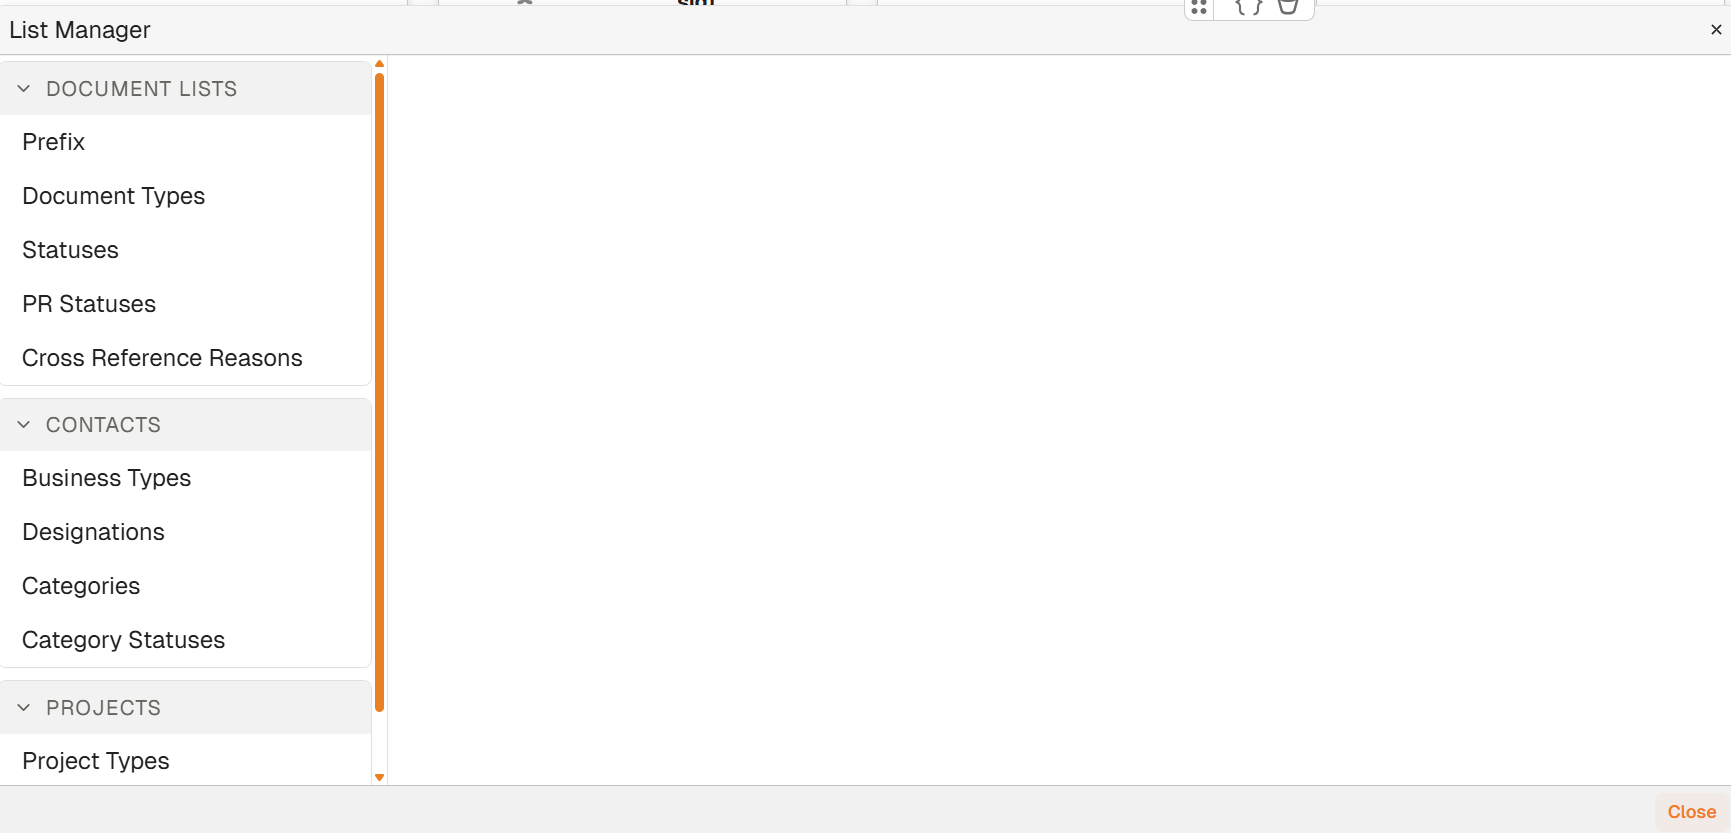
'Manage Lists' Dialog
Document Lists
This section contains lists related to document management.
| List | Description |
|---|---|
| Prefix | Enables users to view, edit and add document prefixes. |
| Document Types | Enables users to view, edit and add document types and subtypes (eg. invoice, certificate, MoM). |
| Statuses | Enables users to view, edit and add document statuses (eg. accepted, approved, cancelled). |
| PR Statuses | Enables users to view, edit and add document post review status (eg. cancelled, no comments, return with comments). |
| Cross Reference Reasons | Enables users to view, edit and add document cross reference reasons (eg. attachment, narrative, referred to). |
Contacts
This section contains lists related to database contacts.
NOTE: Contacts can receive and download documents distributed from Docwize (eg. via transmittal), but cannot perform functions within a Docwize database.
| List | Description |
|---|---|
| Business Types | Enables users to view, edit and add business types (eg. conveyor instruments, logistics, water tanks). |
| Designations | Enables users to view, edit and add contact designations (eg. CEO, Director, MD). |
| Categories | Enables users to view, edit and add additional, customized categories related to contacts. |
| Category Statuses | Enables users to view, edit and add additional, customized category statuses related to contacts (eg. active, inactive). |
Projects
This section contains lists related to database projects.
| List | Description |
|---|---|
| Project Types | Enables users to view, edit and add project types (eg. construction, general management). |
| Project Statuses | Enables users to view, edit and add project statuses (Eg. active, cancelled, completed). |
In each of these subsections, a gridview will reflect existing entries.
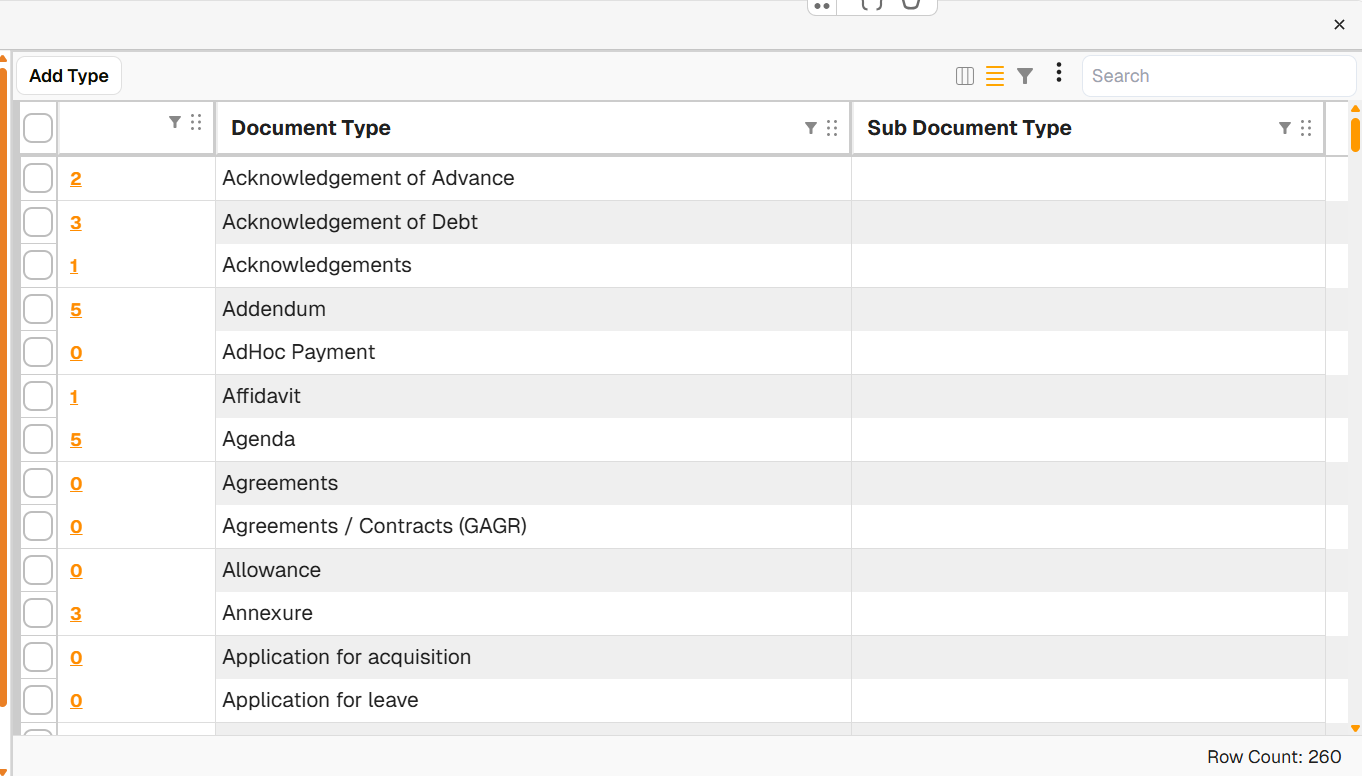
Example Gridview: Document Type List
Gridview Actions
| Item | Description |
|---|---|
| Add | The ‘Add’ button allows users to add a new entry. |
| Tick box | When users select row(s), an ‘Edit Selected’ and ‘Delete Selected’ button will appear, enabling users to edit or deleted selected entries. |
| Hyperlink | Clicking on the hyperlink opens a dialog that lists all the documents linked to the relevant entry. |
NOTE: If there are documents linked to a selected row that a user wants to delete, the user will have to first reassign those documents to a new field before being able to delete the selected entry.
How to Add a Field in the List Manager
| Step | Description |
|---|---|
| 1 | Navigate to the ‘Manage Lists’ section. |
| 2 | Select the relevant list. |
| 3 | Click on the ‘Add’ button and complete the relevant fields, saving changes. |
Here is an example of adding a field to the list manager:
Adding a Field to the List Manager
How to Edit a Field in the List Manager
| Step | Description |
|---|---|
| 1 | Navigate to the ‘Manage Lists’ section. |
| 2 | Select the relevant list. |
| 3 | Click on the tick box of the relevant field to edit. |
| 4 | Click on the ‘Edit’ button. |
| 5 | Edit the field, saving changes. |
Here is an example of editing a field in the list manager:
Editing a Field in the List Manager
How to Delete a Field in the List Manager
| Step | Description |
|---|---|
| 1 | Navigate to the ‘Manage Lists’ section. |
| 2 | Select the relevant list. |
| 3 | Click on the tick box of the relevant field to delete. |
| 4 | Click on the ‘Delete’ button. |
| 5 | Note: If there are documents linked to the field, one has to reassign them to another option prior to deleting the field. |
Here is an example of deleting a field in the list manager:
Deleting a Field in the List Manager