Organising Templates into Groups
Email templates and custom field templates can be organised into named groups. A group can hold templates and other groups, so a tree can be as deep as the organisation needs. Each screen has its own tree: the groups on the Email Templates screen are separate from the groups on the Edit Custom Fields screen.
Groups only change how the list is arranged. Moving a template into a group does not change the template itself.
Note: Workflow template groups are a different feature. They organise workflow templates, not email or custom field templates. See Workflows.
Who configures this
Users with access to the New module. Groups are created on the Email Templates screen, opened from New > Custom Fields & Configuration > Email Template Builder, and on the Edit Custom Fields panel, opened from New > Custom Fields & Configuration > Custom Fields.
What you can do with groups
- Create groups, and subgroups inside groups.
- Rename a group.
- Move templates into a group, or back to Ungrouped, by dragging them or with the keyboard.
- Search templates. Groups that hold a match stay visible.
- Delete a group. Its templates move to Ungrouped, and its subgroups move up one level.
The group tree
Each list starts with Ungrouped, which holds every template that is not in a group. Groups are listed below it.
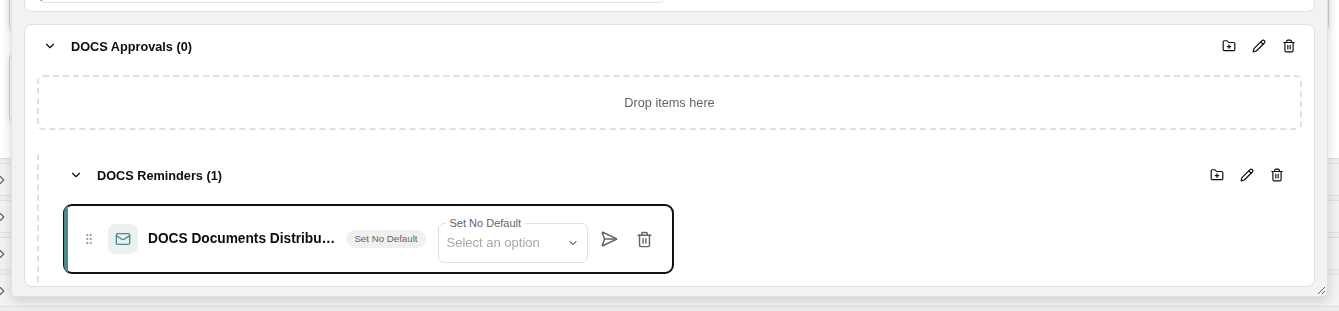
A group with a subgroup and a template in it
| Control | Description |
|---|---|
| Create New Template | Opens the template editor. |
| View inactive | Shows inactive templates in the list. |
| Search templates | Filters the list by template name. |
| Add Group | Creates a group at the top level of the list. |
| Ungrouped | Always listed first. Shows the number of templates that are not in a group. |
Each group has a header with these elements:
| Element | Description |
|---|---|
| Group name and count | The group's name, and the number of templates held directly in it. Templates in its subgroups are not counted. |
| Expand and collapse arrow | Shows or hides the group's contents. |
| Add Subgroup (folder icon) | Creates a subgroup inside this group. |
| Rename Group (pencil icon) | Changes the group's name. |
| Delete (trash icon) | Deletes the group. |
Creating groups
Add Group in the toolbar creates a group at the top level. Add Subgroup in a group's header creates a subgroup inside that group. Both open the same dialog, which asks for a Group Name.
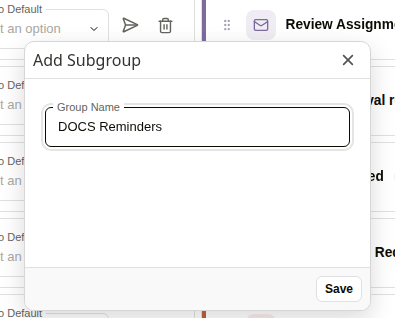
The Add Subgroup dialog
Moving templates into groups
Each template card has a drag handle, the grip at its left edge. Drag the handle onto a group's header or onto the group's area to move the template into that group. Drag it onto Ungrouped to take it out of its group.
An empty group shows Drop items here.
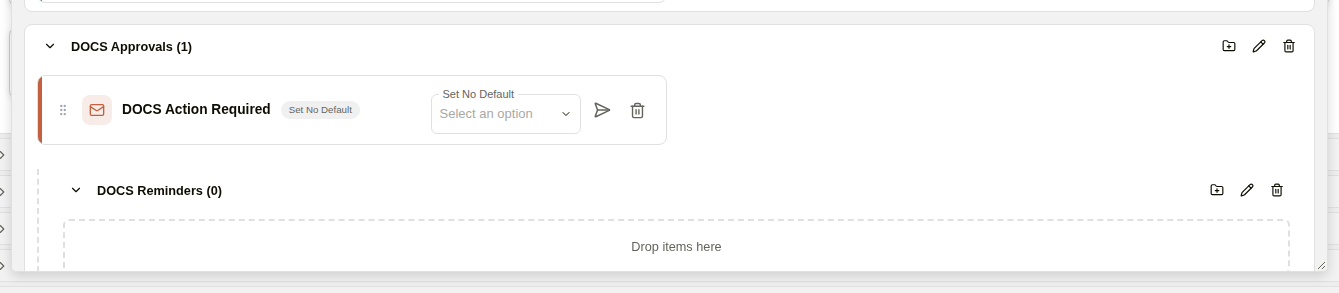
A template moved into a group
Searching groups
Typing in Search templates shows only the templates whose names match. A group that holds a match is shown, together with the groups around it, and groups with no match are hidden. When nothing matches, the list shows No results match your search.
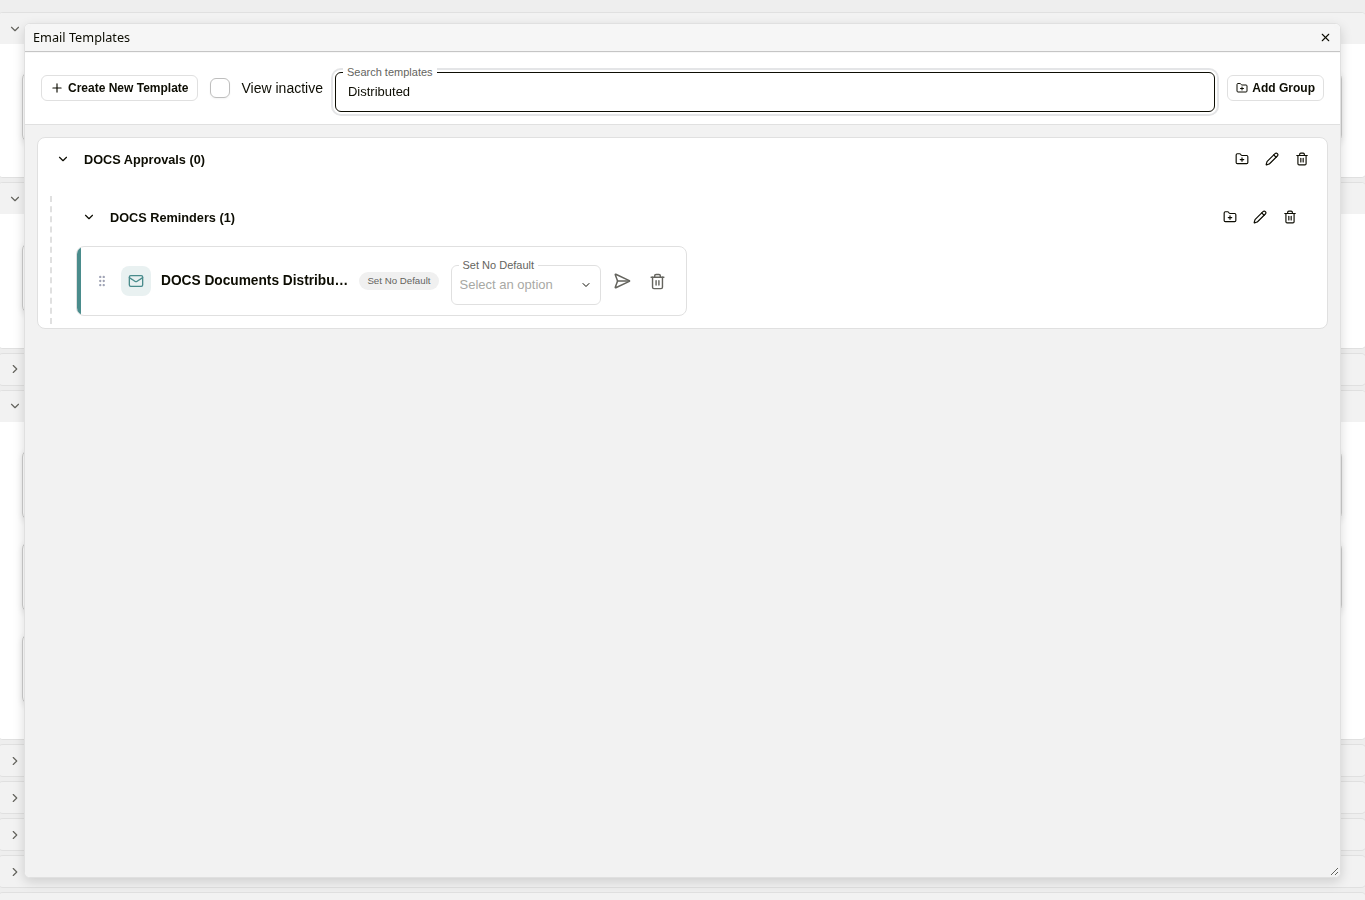
Search showing only the group that holds a match
Group names
- A group name can be up to 100 characters.
- Group names must be unique among the groups at the same level, ignoring capitals. If a new or renamed group would have the same name as a sibling, the dialog stays open and shows an error, and the list does not change.
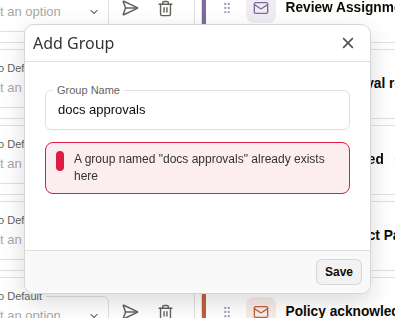
The Add Group dialog with a duplicate name
Deleting groups
Deleting a group asks for confirmation first.
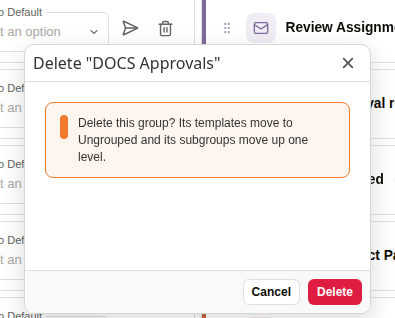
The delete confirmation
When a group is deleted:
- Its templates move to Ungrouped.
- Its subgroups move up one level, to the group that contained the deleted group, or to the top level.
- A subgroup that has the same name as the deleted group moves up with the other subgroups.
A delete is refused when a subgroup would be placed beside a group with the same name. The dialog names both groups, and the group is kept. Rename one of the two groups, and then delete again.
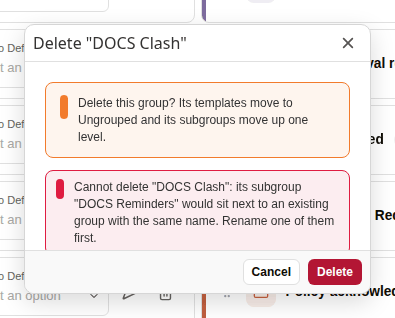
The delete dialog showing why the group cannot be deleted
Custom field templates
The Edit Custom Fields panel has the same toolbar, group header and drag and drop as the Email Templates screen. Groups created on that panel are shown on it only.
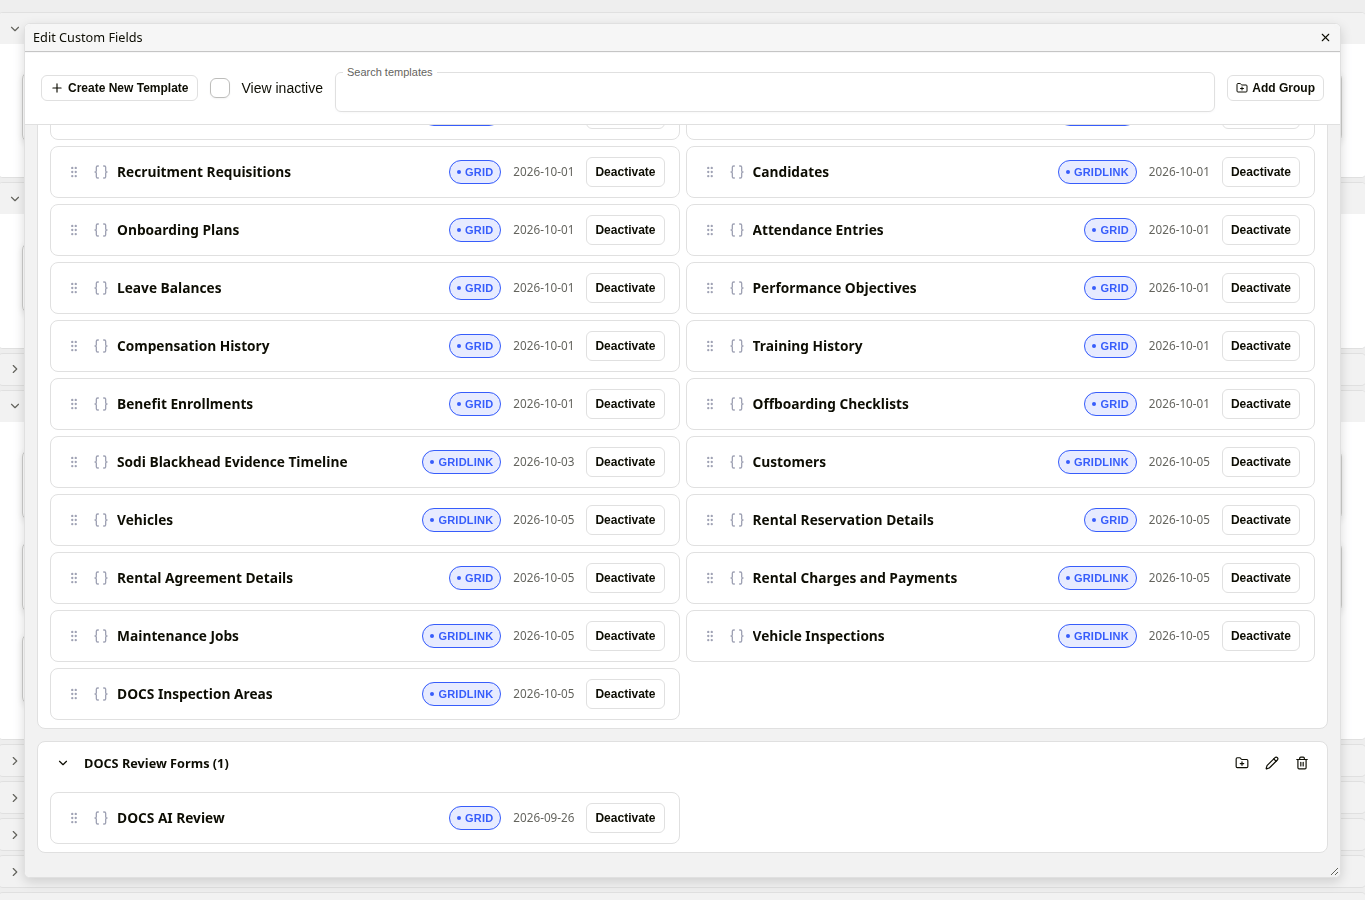
The Edit Custom Fields panel with a group
How to create a group
| Step | Description |
|---|---|
| 1 | Open the Email Templates screen or the Edit Custom Fields panel. |
| 2 | Click Add Group. |
| 3 | Enter a Group Name, and click Save. |
| 4 | To create a subgroup, click Add Subgroup (folder icon) in the group's header. Enter a Group Name, and click Save. |
How to rename a group
| Step | Description |
|---|---|
| 1 | Click Rename Group (pencil icon) in the group's header. |
| 2 | Change the Group Name, and click Save. |
How to move a template into a group
| Step | Description |
|---|---|
| 1 | Drag the template's drag handle onto the group's header or its area. |
| 2 | To take a template out of its group, drag it onto Ungrouped. |
To move a template with the keyboard:
| Step | Description |
|---|---|
| 1 | Move focus to the template's drag handle. It is labelled Move followed by the template's name. |
| 2 | Press Space to pick the template up. |
| 3 | Press the arrow keys to move the template between groups, until the group you want is highlighted. |
| 4 | Press Space to drop the template in that group. |
How to delete a group
| Step | Description |
|---|---|
| 1 | Click Delete (trash icon) in the group's header. |
| 2 | Read the confirmation, and click Delete. To keep the group, click Cancel. |
Related configuration
- Email Builder — the Email Templates screen
- Custom Field Templates — the Edit Custom Fields panel
- Workflows — workflow template groups, a separate feature