Records
Records are configurable forms used to capture structured inputs and initiate actions in Docwize. For example, a record can be used to upload a document and send it to a workflow, generate a reference number, capture invoice data, or submit an approval request. The sections and fields within each record are configured by an administrator and will vary depending on the record template.

What users can do in Records
- Select and complete a record template
- Upload attachments via the record
- Enter data into form fields
- Add and manage rows in a grid
- Link rows to existing data via a gridlink section
- Save the completed record
How to access Records
Records are accessed via the 'New' module in the sidebar. Available record templates are listed under the 'Records' section.
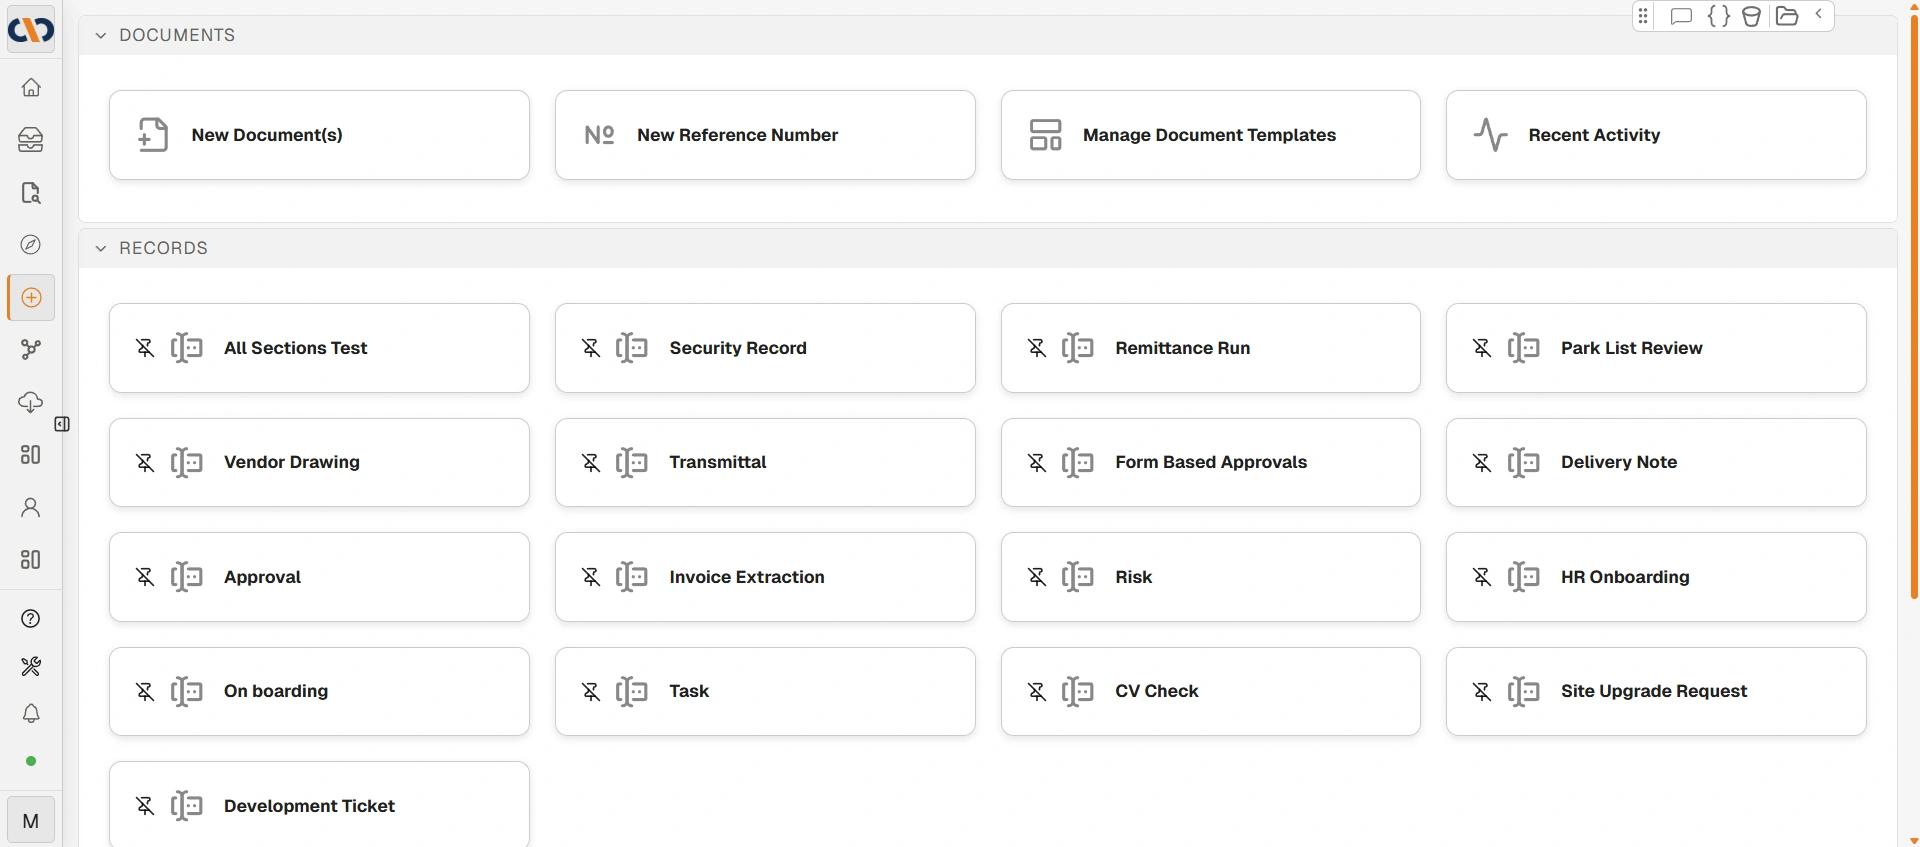
'Records' section in the 'New' module
Selecting a record template opens it as a panel on the right side of the screen.
Record interface
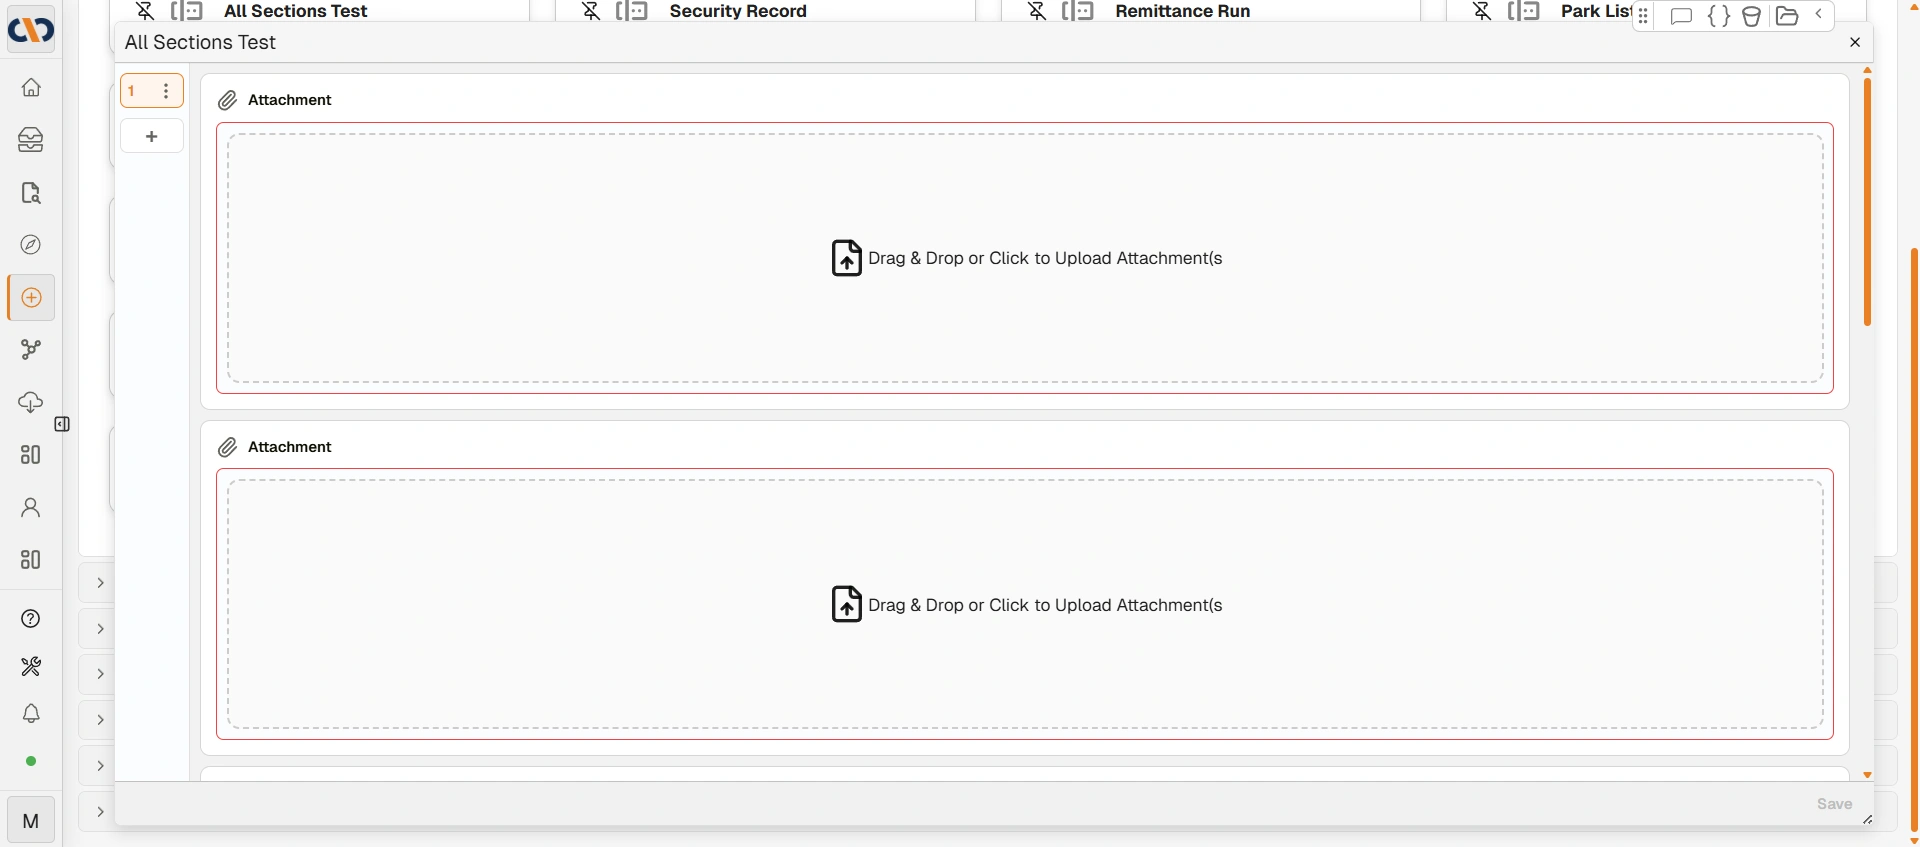
Example: An open record
Left sidebar
| Field | Description |
|---|---|
| Row number (e.g. 1) | Identifies the current number of records generated. Users can bulk-generate records (eg. bulk generation of reference numbers). |
| ⋮ | Opens options for the selected row. |
| + | Opens up a dialog for users to select how many additional records they want to generate. |
Record sections
The main area of a record contains one or more sections. The sections present depend on the record template. Common section types are:
| Section type | Description |
|---|---|
| Attachment | A drag-and-drop upload zone. Files can be dragged in or selected by clicking. |
| Grid Section | A grid where rows of data can be added and managed. Includes 'Add Row', search, and density controls. Displays a row count. For configuration details, see Creating a Record Template. |
| Grid Link Section | A linked grid that connects to an existing data source. Includes a 'Link Rows' button, search, and density controls. For configuration details, see Creating a Record Template. |
| Form Section | A set of labelled input fields for capturing structured data such as reference numbers, dates, and amounts. Required fields are highlighted in red. For configuration details, see Creating a Record Template. |
Footer
| Field | Description |
|---|---|
| Save | Saves the completed record. Disabled until all required fields have been filled. |
How to complete a record
| Step | Description |
|---|---|
| 1 | Navigate to the 'New' module and select the relevant record template from the 'Records' section. |
| 2 | Complete the sections in the record: upload any required attachments, fill in form fields, and add rows to grids as needed. |
| 3 | Click 'Save' to submit the record. The 'Save' button becomes active once all required fields have been completed. |