Manage Registers
The Grid Link Editor is the interface for viewing and managing the row-level data stored in Grid Link custom field templates. Each Grid Link template appears here as a named register — for example, an employee register, an asset register, or a risk register. Users use this area to add, edit, delete, and import rows into registers without navigating individual documents.
Who configures this
Users with access to the New module. Manage Registers is accessible from New > Custom Fields & Configuration > Manage Registers.
Grid Link Editor
The Grid Link Editor panel lists all Grid Link custom field templates in the database.
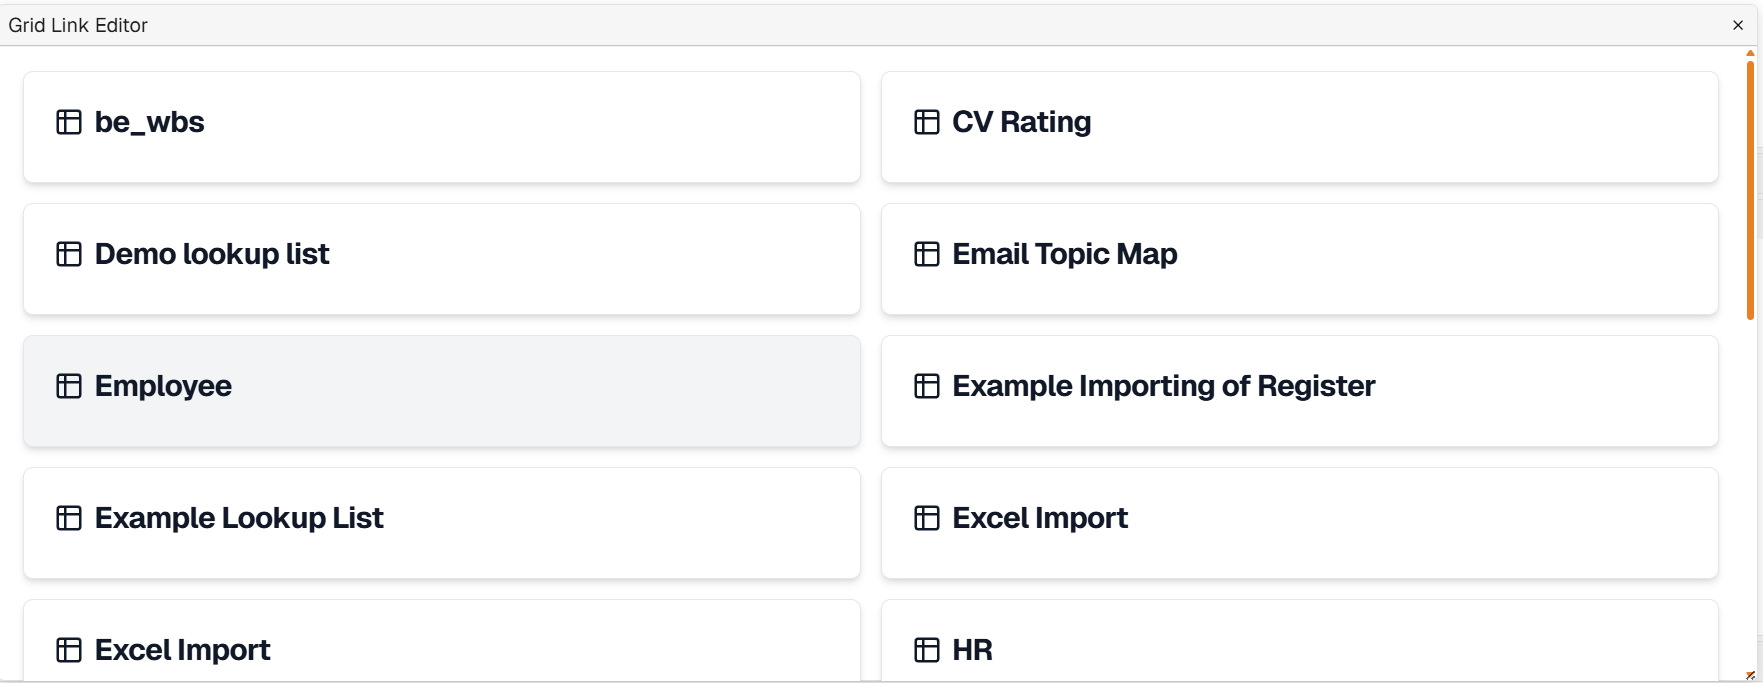
Grid Link Editor panel
Clicking a register name opens the register data view for that register.
Register data view
When a register is opened, the register name appears at the top of the view alongside the following toolbar controls:
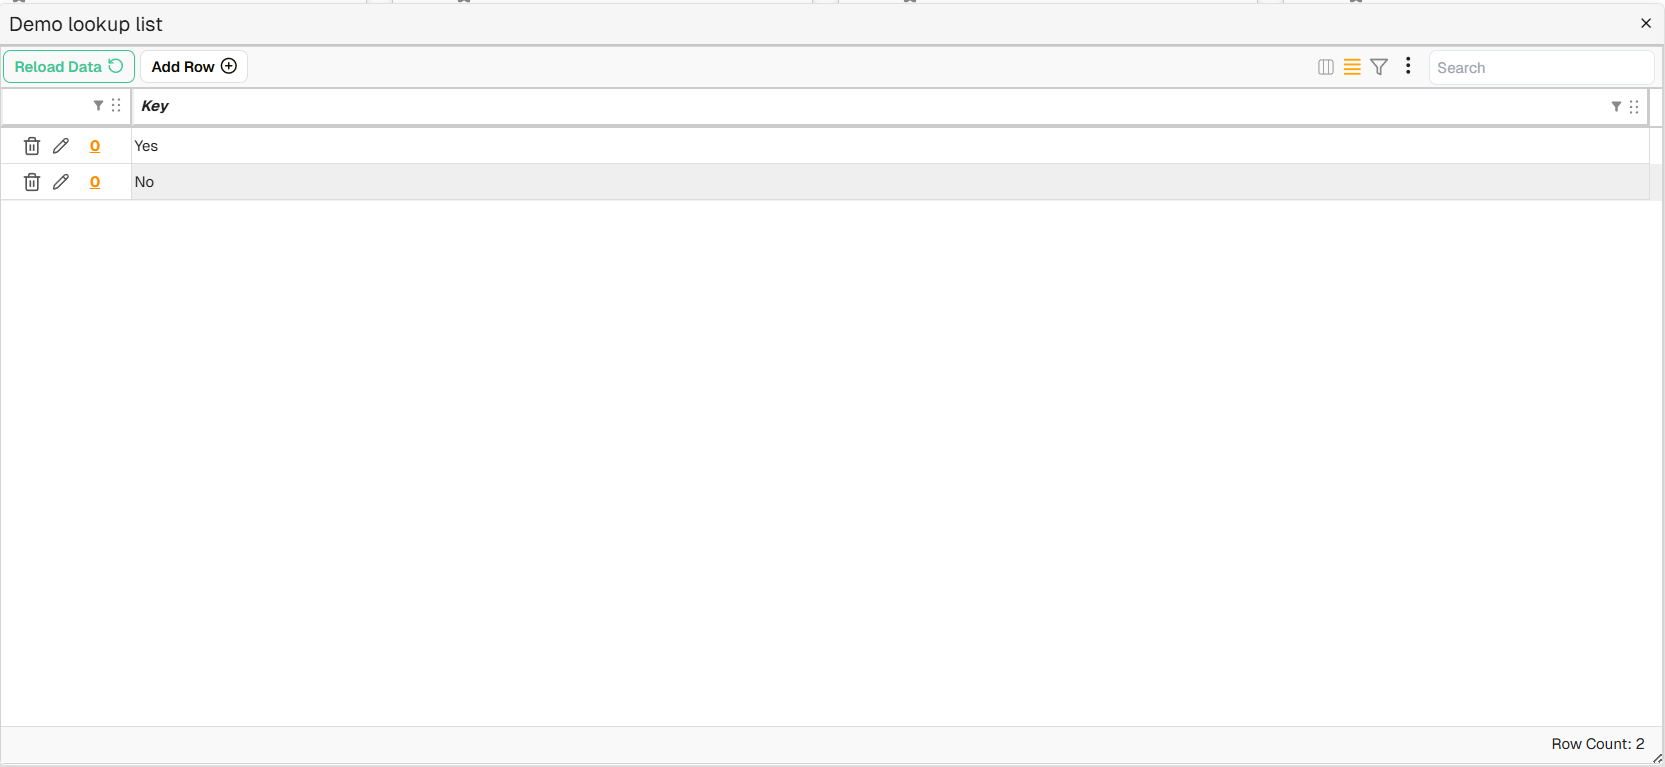
Example register data view
| Control | Description |
|---|---|
| Reload Data | Refreshes the register data from the database. |
| Add Row | Opens a form to add a new row to the register. |
| Toggle Density | Switches row height between compact and standard display. |
| Filter | Toggles column filter inputs on and off. |
| Search | Filters the visible rows by text. |
| ⋮ (3-dots menu) | Opens additional options, including Import Data for importing rows from an Excel file. |
Each existing row in the register displays the following controls:
| Control | Description |
|---|---|
| Delete (bin icon) | Deletes the row from the register. |
| Edit (pencil icon) | Opens the row for editing. |
| Linked documents count | An orange number indicating how many documents are linked to this row. Clicking it opens the list of linked documents. |
The Row Count indicator at the bottom of the view shows the total number of rows in the register.
How to create a register
A register is created by configuring a Grid Link custom field template. The register appears automatically in the Grid Link Editor once the template is saved.
| Step | Description |
|---|---|
| 1 | Navigate to New > Custom Fields & Configuration > Custom Fields. |
| 2 | Click Create New Template. |
| 3 | Set Template Type to Grid Link, enter a template name, and configure the remaining settings. |
| 4 | Add the required field entries and click Save Template. See Custom Field Templates. The template now appears as a register in the Grid Link Editor. |
How to add rows to a register
| Step | Description |
|---|---|
| 1 | Navigate to New > Custom Fields & Configuration > Manage Registers. |
| 2 | Select the relevant register. |
| 3 | Click Add Row, complete the fields, and save. |
| 4 | Repeat for each additional row required. |
How to import a register from Excel
| Step | Description |
|---|---|
| 1 | Open the Grid Link template in the template editor. Click Auto Import Columns in the toolbar to import column definitions from an Excel file. Follow the prompts to select the relevant sheet and fields. See Custom Field Templates. |
| 2 | Verify that the field types for all imported columns are correct (for example, date columns should use type Date, not FreeText). Click Save Template. |
| 3 | Navigate to New > Custom Fields & Configuration > Manage Registers and select the register. |
| 4 | Click ⋮ and select Import Data. |
| 5 | Drag and drop the Excel file into the import dialog. Select the relevant sheet from the tabs at the bottom of the dialog. |
| 6 | Select the rows to import using the tick boxes on the left. Pin the header row if required, then click Finish. |
| 7 | Map the columns to the template fields. The importer pre-fills likely matches — review and adjust as needed. |
| 8 | Validate the mapping. Rows in green will import successfully. Rows in light red will fail validation; rows in dark red contain errors that can be edited inline. Only valid rows are imported. Click Proceed to complete the import. |
Example: importing a register
Troubleshooting
| Risk | Detail |
|---|---|
| Register not appearing in the Grid Link Editor | Only Grid Link templates appear in this view. Grid and Filter templates do not appear. Check the Template Type setting on the template. |
| Import rows failing (light red) | The row data does not match the mapped column type. Review the column mapping and correct any type mismatches. |
| Import rows showing errors (dark red) | The row contains a data error. Click the row to edit it inline before proceeding. |
| Cannot delete a row | If the row is linked to documents, the link must be removed from each document's custom field view before the row can be deleted. |
Related configuration
- Custom Fields overview — introduction to the custom fields configuration sequence
- Custom Field Templates — create and configure the Grid Link template that powers a register
- Lookup Lists — configure lookup lists sourced from Grid Link register data