FAQs
This page answers common user questions and points to the main documentation pages for fuller instructions.
Access and sign-in
How do I access my database?
To log on to Docwize, go to https://portal.docwize.com/. You can usually sign in with your username and password, or by using a pre-existing Google or Microsoft account.
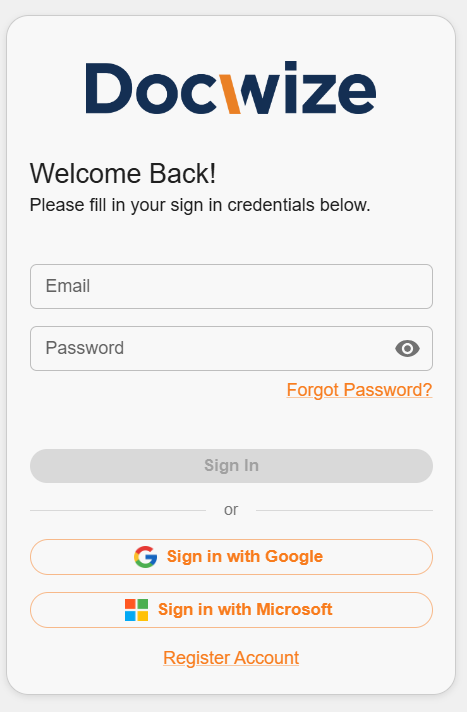
Docwize Login
| Step | Description |
|---|---|
| 1 | Enter your username and password, or choose a supported sign-in option. |
| 2 | Select your company’s database from the drop-down menu, if prompted. |
| 3 | Continue to the homepage. |
For more detail, see Logging In.
Why can’t I sign in via Microsoft?
If you’re having trouble signing in via Microsoft, the issue may need to be resolved outside of Docwize. Try logging in at https://login.microsoftonline.com/ using the same browser. Once you have successfully logged in there, you should usually be able to sign in to Docwize with Microsoft as long as that session remains active.
Working with documents
How do I bulk assign documents?
Select the relevant documents in the grid, open Assign, and choose whether to work with all or selected items. Then choose the target area, such as Details, Tags, Folders, Locations, or Workflows.
For full instructions, see Assigning Docs.
How do I export documents?
Select the relevant documents in the grid, choose Export, and configure the required export options.
For full instructions, see Exports & Downloads.
How do I annotate a document?
Open the document in Document Preview, use the annotation tools, and then complete the required action.
For full instructions, see Annotations.
How do I create a signature and sign a document?
| Step | Description |
|---|---|
| 1 | Navigate to the Preview Document window and to the Annotation toolbar. |
| 2 | Click on ‘Signature' icon. |
| 3 | Click on 'Create New'. |
| 4 | Select your method of creating a signature (system-generated, by hand, or by uploading a signature). |
| 5 | Save the signature. |
| 6 | To proceed to sign the document, click on the 'Signature' icon again. |
| 7 | Select the signature. |
| 6 | Place and size the signature according to your preference. |
| 7 | Click on the 'Sign Document' button at the top of the page. |
For full instructions, see Digital Signing.
How do I create a tag and tag a document?
| Step | Description |
|---|---|
| 1 | Navigate to the 'Tag' sidebar. |
| 2 | Click on the orange '+' sign located next to the phrase 'Tag'. |
| 3 | Type in the name of the tag you want to create. |
| 4 | Click 'Save'. The new tag will now exist in the list of created tags. |
| 5 | Click on the tag in the list and it will tag the open document. For more details on tagging, see the Tags section. |
For full instructions, see Tags.
How do I un-tag a document and delete a tag?
| Step | Description |
|---|---|
| 1 | Navigate to the 'Tag' sidebar. |
| 2 | Click on trashcan icon of the tag that you want to remove. This will un-tag the document. |
| 3 | To delete the tag completely, navigate to the three dots by the name of the relevant tag. |
| 4 | Select 'Delete' from the drop-down menu. |
| 5 | Follow the instructions in the pop-up dialog. For more details on tagging, see the Tags section. |
For full instructions, see Tags.
How do I add a note?
| Step | Description |
|---|---|
| 1 | Navigate to the note-making section of the sidebar. |
| 2 | Click on the "+" and select whether to make a private or public note. |
| 3 | Add the note. |
| 4 | Click 'Save'. For more details on notes, see the Notes section. |
Uploads and document management
How do I complete a record?
| Step | Description |
|---|---|
| 1 | Navigate to the ‘Record’ selection and click on the relevant record. |
| 2 | Complete the information, as prompted to, in the record. Note: this will vary, depending on the record template that was created. |
| 3 | Click ‘Save’ to complete the record-making process. For more details on records, see the Records section. |
For full instructions, see Completing a Record.
How do I initiate an export and access downloads and bundles?
| Step | Description |
|---|---|
| 1 | Select the items you wish to export from any grid in the Docwize Portal. |
| 2 | Configure the Export options. |
| 3 | Select ‘Start Export’. |
| 4 | Navigate to the ‘Downloads’ module. |
| 5 | Click on the 'Download' icon of the relevant download. For more details on Downloading, see in the Exports and Downloads section. |
| For full instructions, see Exports & Downloads. |
How can I select documents for assigning them to tags/workflows/gridlinks etc?
Users can select one or multiple documents for assigning documents:
-
Individual Selection: Select the box by the relevant document, ticking it for selection
-
Section Selection: Click on the box of the first relevant document in the selection. Hold down the 'Shift' key. Click the last document in the relevant selection.
-
Select All: Click on the upper-most box in the Doc Grid to select all documents
For full instructions, see Assigning Docs.
How do I upload a single document/create a placeholder document in Explorer?
The easiest way to upload a single document is to drag it into the target folder from your file explorer. The 'Bulk Upload Files' option below will then appear. Alternatively, users can create a placeholder document and upload the file later.
| Step | Description |
|---|---|
| 1 | Navigate to ‘New’ in the Explorer’s grid view and select ‘Blank Document’. |
| 2 | Provide a description and select a document type. Click ‘Save’. |
| 3 | Either immediately upload the relevant file or exit the ‘Document Details’ dialog to leave the document as a placeholder document. |
| 4 | Optional: users can complete additional fields of metadata pertaining to the document in the ‘Document Details’ dialog. |
For full instructions, see Upload in Folder View.
How do I bulk upload files/folders in Explorer?
| Step | Description |
|---|---|
| 1 | Navigate to ‘New’ in the Explorer’s grid view and select ‘Bulk Upload Files’ or 'Bulk Upload Folder'. |
| 2 | Select the relevant files/folder from your device. |
| 3 | Optional: revise the document metadata. |
| 4 | Select ‘Start Upload’. |
| 5 | Optional: select specific documents/files and click on ‘Assign' to bulk assign documents as needed. |
For full instructions, see Upload in Folder View.
How do I upload documents via the 'Upload Document(s)' dialog in the 'New' module?
| Step | Description |
|---|---|
| 1 | Navigate to the ‘New’ module and click on the ‘New Document(s)’ icon. |
| 2 | Drag and drop the relevant file(s) into the ‘Upload Document(s)’ pop-up dialog, or select the relevant files. |
| 3 | Complete the relevant metadata (eg. document type, relevant project, doc status). |
| 4 | Click ‘Next’ and allocate the document(s) to the relevant folder(s). |
| 5 | Click ‘Next’ and allocate the document(s) to the relevant location(s). |
| 6 | Either close the dialog or choose to send the document(s) to a workflow. |
For full instructions, see Upload via the New Module.
How do I upload a file version?
| Step | Description |
|---|---|
| 1 | 'Right-click' on the relevant document and select 'File Versions' from the dropdown menu. |
| 2 | Click on 'Replace File'. |
| 3 | Select the required file and click 'Confirm'. |
For full instructions, see File Versions.
How do I upload an attachment to a file?
| Step | Description |
|---|---|
| 1 | 'Right-click' on the relevant document and select 'Attachments' from the dropdown menu. |
| 2 | Click on 'Add Attachment' and select the relevant document. |
| 3 | Complete the relevant meta data (eg. document type, relevant project, doc status). |
| 4 | Click ‘Next’ and allocate the document(s) to the relevant folder(s). |
| 5 | Click ‘Next’ and allocate the document(s) to the relevant location(s). |
| 6 | Exit out of the dialog. The attachment will reflect. |
For full instructions, see Attachments.
Records and workflows
How do I create a record template?
| Step | Description |
|---|---|
| 1 | Navigate to ‘Manage Records’ and select ‘Create a new record’. |
| 2 | Name your record and select which user groups can access the record to be able to complete it. |
| 3 | Type in your preferred name for a record section and select the type of section it is. Repeat until you have added all relevant sections. |
| 4 | Select your preferred settings (visible or hidden, optional or required) for each section. |
| 5 | If applicable, add additional options pertaining to the field. (For example, if you add a ‘Custom Field’ section, you need to select the relevant custom field template.) |
| 6 | Click ‘Save’. |
| 7 | Optional: click the ‘View Live Preview’ button to view your record template. For more details on records, see the Records section. |
Record template creation is a configuration task. For more detail, see the relevant configuration pages under Records and Custom Fields.
How do I create an 'Action Request' for a workflow?
To create a new 'Action Request', complete the following steps:
| Step | Description |
|---|---|
| 1 | Navigate to the 'Action Request Editor' dialog. |
| 2 | Click on the 'plus' button. |
| 3 | Name the action request. |
| 4 | Add relevant response options. |
| 5 | Optional: configure reply options. For more details, see the Workflows configuration section. |
How do I create a Lookup List?
| Step | Description |
|---|---|
| 1 | Go to 'Custom Fields' and create a gridlink custom field template with the relevant field(s) for the lookup list. The field(s) will become the key(s), or column name(s) in the lookup list. Save the custom field. See Create New Custom Field Template for more detailed instructions. |
| 2 | Click on 'Add Row' and populate the register with the row(s) relevant to the lookup list's column(s). |
| 3 | Go to the 'Query Lab'. Drag and drop the relevant custom field into the Query lab canvas. Select which row(s) need to be visible. Test the query and use the tools in the righthand section to refine it. Save the relevant query. See Query Builder for more detailed instructions. |
| 4 | Go to the 'Lookup List Builder' and select the relevant virtual view/custom field template(s) and save. |
| 5 | Create and/or navigate to an already-created custom field template where the lookup list needs to appear. Select 'LookupList' as the 'Field Type' and select the relevant Lookup List name. |
How do I add a field in the list manager?
| Step | Description |
|---|---|
| 1 | Navigate to the ‘Manage Lists’ section. |
| 2 | Select the relevant list. |
| 3 | Click on the ‘Add’ button and complete the relevant fields, saving changes. |
Here is an example of adding a field to the list manager:
Adding a Field to the List Manager
How do I edit a field in the list manager?
| Step | Description |
|---|---|
| 1 | Navigate to the ‘Manage Lists’ section. |
| 2 | Select the relevant list. |
| 3 | Click on the tick box of the relevant field to edit. |
| 4 | Click on the ‘Edit’ button. |
| 5 | Edit the field, saving changes. |
Here is an example of editing a field in the list manager:
Editing a Field in the List Manager
How do I delete a field in the list manager?
| Step | Description |
|---|---|
| 1 | Navigate to the ‘Manage Lists’ section. |
| 2 | Select the relevant list. |
| 3 | Click on the tick box of the relevant field to delete. |
| 4 | Click on the ‘Delete’ button. |
| 5 | Note: If there are documents linked to the field, one has to reassign them to another option prior to deleting the field. |
Here is an example of deleting a field in the list manager:
Deleting a Field in the List Manager