Tags
In Docwize, users have the option of tagging a document. A tag functions like a colorful ‘sticky note’ that helps identify documents related to a similar topic and/or that contain the same key phrases, format, or content. Depending on permissions, users can create tags, tag documents, un-tag documents, and delete tags. One document can have multiple tags attached to it. Users also have the option of assigning a single document to a tag, or bulk-assigning documents to a tag.
What you can do in Tags
- Create and manage tags
- Apply or remove tags from documents
- Use tags in the preview sidebar
- Bulk-assign documents to a tag
Manage Tags
Tags can be created, modified and customized in the ‘Manage Tags’ section located in the Tags section of the Explorer module. Permission to access ‘Manage Tags’ is managed in the Admin Console.
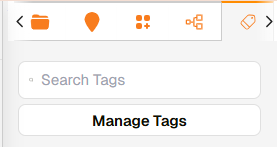
‘Manage Tags’ button in Explorer – Tags
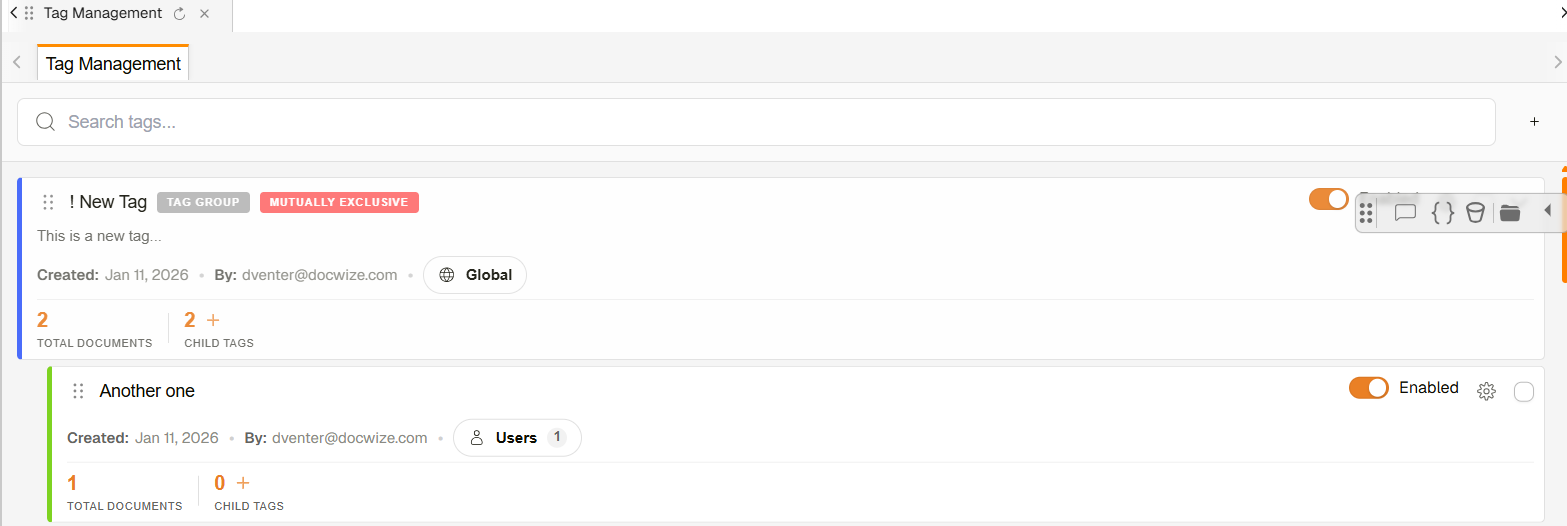
Example: The ‘Manage Tags’ section layout
Manage Tags details
| Item | Description |
|---|---|
| Search | Enables users to search tag names |
| Plus sign | Enables users to create a new tag |
Whether a user clicks on the plus sign to create a new tag, or on the settings icon in a created tag, the user will be directed to the 'Create New Tag' dialog.
Create New Tag dialog
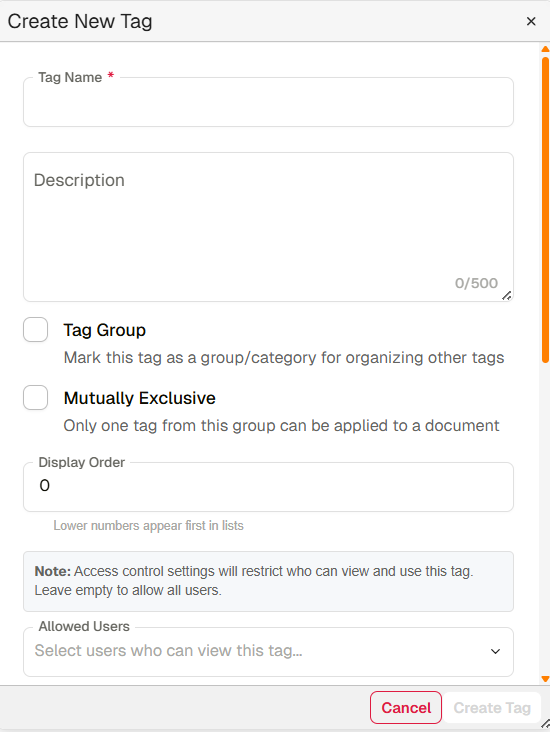
'Create New Tag' Dialog
| Field | Description |
|---|---|
| Tag Name | This is a required field. Users can input the relevant tag name. |
| Description | If desired, users can provide a more detailed description relating to the tag. |
| Tag Group | Indicates that this is a primary category by which other tags can be organized or clustered. In practice, a user can apply multiple tags in the tag group to a document. |
| Mutually Exclusive | Indicates that users will only be able to select one tag from within its collection of options to apply to a document. (For example, users will select between a tag ‘Relevant’ and ‘Irrelevant’. A document cannot be both ‘Relevant and ‘Irrelevant’.) |
| Display Order | If applicable, enables users to set the order in which tags in a group appear. |
| Allowed Users | Note: the default setting is that all users can see all tags. This option enables the selection from a list of Docwize users, limiting the visibility of the tag only to the selected users. |
| Allowed Groups | Note: the default setting is that all users can see all tags. This option enables the selection of groups created in the database, limiting the visibility of the tag only to users who belong to selected groups. |
| Tag Color | Users can choose to customize the color of the tag using the Tag Color section. |
| Cancel | Enables users to cancel any modifications and/or the creation of a tag. |
| Create Tag / Save Changes | Enables users to complete the creation of a tag, or to save modifications made to an existing tag. |
When a tag is created, it populates the ‘Manage Tags’ section. Metadata as well as additional management options are displayed per tag and sub tag.
Listed Tags
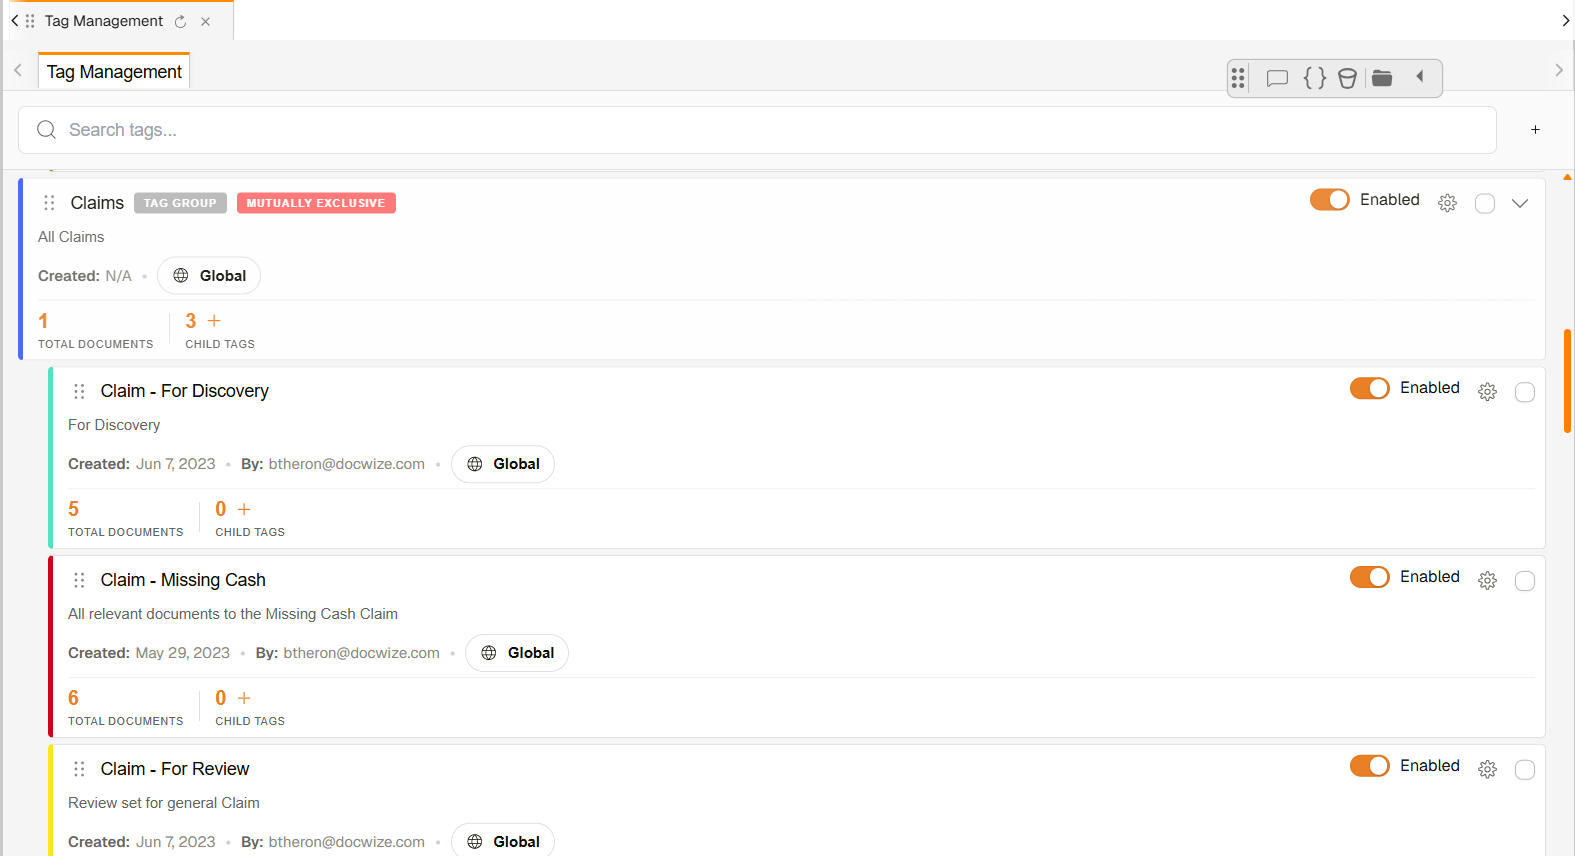
Example: Listed Tags
| Area | Description |
|---|---|
| Top left section of a listed tag | Indicates the tag name, type of tag, given description (if included), date of creation, creator and visibility settings. Hovering over the visibility settings will list selected users/groups when a tag is limited to specific users and/or groups. |
| Top right section – ‘Enabled’ toggle | Allows a user to select whether the tag is enabled or not. Disabled tags will be hidden from users. |
| Settings icon | Navigates to the tag’s settings dialog for modifications |
| Tick box | When ticked, allows a user to apply bulk actions to selected tags. |
| Total Documents | Provides a count of how many documents are tagged with this tag. Clicking on the number will direct users to the cluster of tagged documents. |
| Child Tags | Indicates how many child tags have been created. The plus sign allows users to create child tags. |
Accessing Tags
Tags are accessed by clicking on the hamburger icon in the Preview Document's horizontal toolbar to access the sidebar. Then, one can navigate to the 'Tag' section on the sidebar.
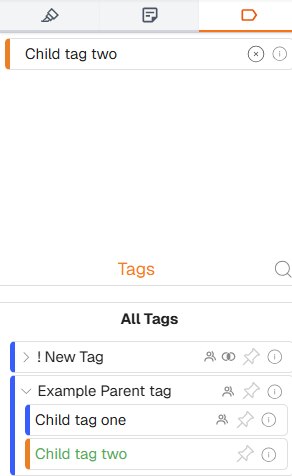
Example: Sidebar Displaying Tags
Sidebar details
| Item | Description |
|---|---|
| Tag icon | Navigates to the tag section. |
| Applied tags list | A list of tags that have been applied to the document being previewed will be listed here. |
| Remove tag (x) | Clicking on the 'x' will remove the selected tag from the document. |
| Information icon | In instances where a description was provided, hovering over the information icon will list the relevant tag’s description. |
| Search | Enables users to search tags by their name. Users can double-click on the options listed to apply the tag/sub tag to the document. |
| Expand / collapse arrow | Expands/collapses list of sub-tags pertaining to the relevant tag group. |
| Hover menu | Hovering over the group or mutually exclusive icon populates the list of sub tags related to the selected tag group, or the related mutually exclusive options. Users can double-click on the options listed to apply the tag/sub tag to the document. |
| Pin | Pins the tag group to the top of the ‘Tags’ section in the sidebar. Pinning frequently used tags allows for convenient access. |
| Information icon | In instances where a description was provided, hovering over the information icon will list the relevant tag’s description. |
How to create a tag
| Step | Description |
|---|---|
| 1 | Navigate to the 'Manage Tags' section in Explorer - Tags. |
| 2 | Click on the '+' sign located next to the right of the Search bar. |
| 3 | Complete the information pertaining to the relevant tag (tag name, permissions, color, etc.). |
| 4 | Click 'Save'. |
Here is an example of creating a tag:
Example: Creating a tag
How to tag a single document
| Step | Description |
|---|---|
| 1 | Open the relevant document in the 'Preview Document' view. |
| 2 | Navigate to the tag section in the right-hand side bar. |
| 3 | Select the relevant tag group and either expand the sub tag options, or hover over the grouping icon, to populate a list of associated tags. Double-click on the relevant tag. |
| 4 | The name of the selected tag will populate the 'tagged' section, indicating that the tag is applied to the document. |
Here is an example of tagging a single document:
Example: Tagging a single document
How to un-tag a document
| Step | Description |
|---|---|
| 1 | Open the relevant document in the 'Preview Document' view. |
| 2 | Navigate to the Tag section in the right-hand side bar. |
| 3 | Click on the 'x' icon of the tag you want to remove from the document. |
Here is an example of un-tagging a document:
Example: Un-tagging a document
How to bulk-assign documents to a tag
| Step | Description |
|---|---|
| 1 | Click on the box icon to select the relevant document(s) OR directly click on ‘Assign’ and choose ‘Select All’ to select all documents in grid display.Note: The upper most checkbox in the toolbar can be used to select all or deselect all documents. |
| 2 | Click on ‘Assign’ and choose ‘All’ or ‘Selected’. |
| 3 | From the horizontal toolbar in the pop-up dialog, select the Tag option. |
| 4 | Click on the "+" sign of the relevant tag you want to assign. |
| 5 | Click 'Save'. |
Here is an example of how to bulk-assign documents to a tag:
Example: Bulk-assigning documents to a tag