Document Grid
The document grid is used throughout the Portal. It is how lists of documents are displayed. These lists can come from a variety of sources, such as search results, folder contents, and dataviews.

What users can do in the Document Grid
- View lists of documents from different parts of the Portal
- Assign, export, and search documents in the grid
- Filter, pin, and rearrange fields in the grid view
- Open document-specific actions from the grid
The Grid Toolbar
Note: there are some slight variations in the grid display for ones generated as search results compared to ones accessed via different modules. This page will first describe what is included in all grids, before looking specifically at the grids generated from Search results.
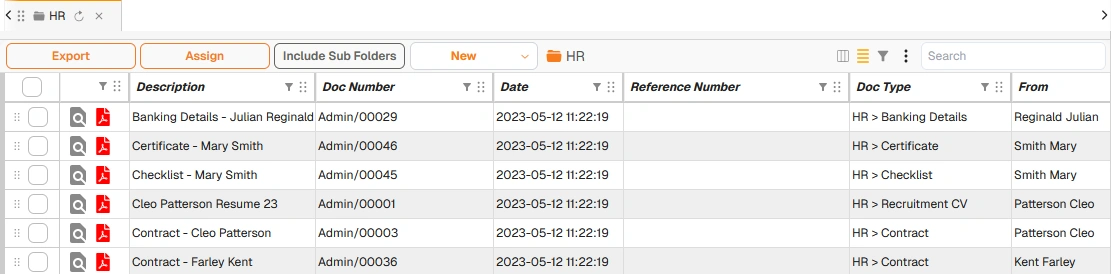
Example: General Grid Toolbar
| Field | Description |
|---|---|
| Assign | Enables bulk assignment of selected/all documents to Folders, Workflows, Document Details, Tags, Grid links, Locations, etc. |
| Export | Enables bulk export of selected/all documents. Document exports and bundles are useful for sharing documents with external parties. |
| Include Sub Folders | Populates the Document Grid with documents from all associated sub folders. |
| New | Enables single and bulk upload of documents into Docwize. |
 | Enables users to select and pin field(s) in the view, as needed. |
 | Broadens or shrinks the cell size of fields so that all text is visible or not, as needed. |
 | Enables users to select conditions for filtering fields. |
 | Enables users to export the grid content to Excel. |
| Search | Filters rows across all visible columns. Uses the same filter engine as column filters — entering a term narrows the displayed rows and updates the row count accordingly. Grouped row counts also update to reflect the filtered set. |
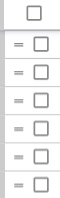 | Clicking on the box(es) selects the document(s) for assigning/exporting. |
 | Enables users to select and sort content by the chosen field, using 'drag-and-drop'. |
 | Enables grid refresh of the display. |
 | Closes the grid display. |
Export Options
Clicking Export in the grid toolbar opens the Export Options dialog. The dialog is divided into four sections.
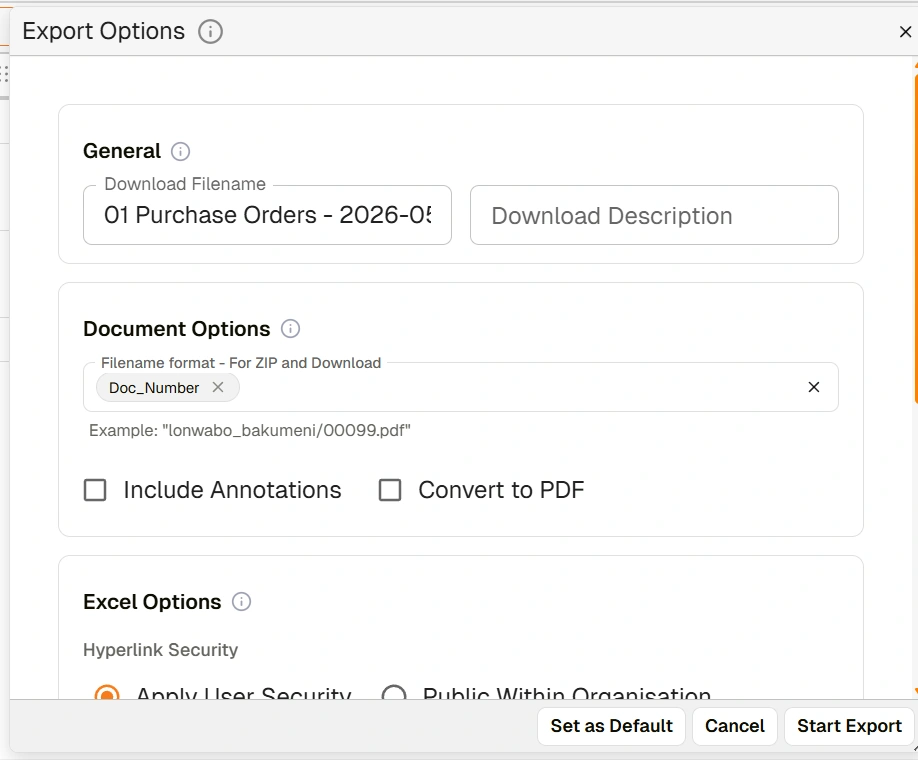
Export Options dialog — General and Document Options
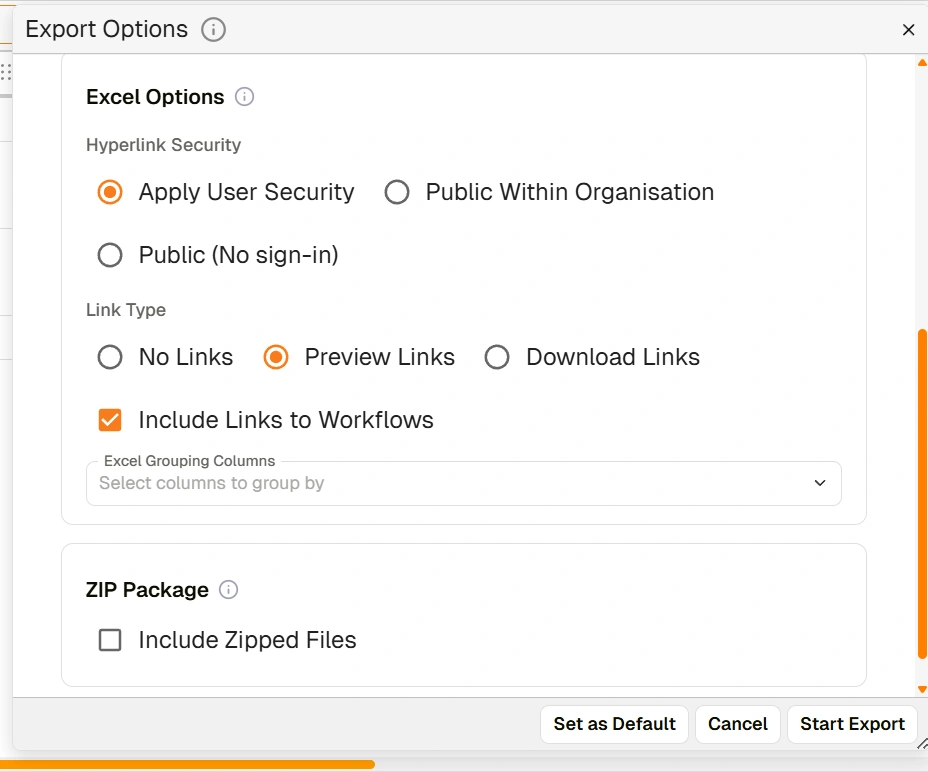
Export Options dialog — Excel Options and ZIP Package
General
| Field | Description |
|---|---|
| Download Filename | The filename assigned to the export. A default name is auto-generated based on the current view and date, but users can edit it. |
| Download Description | An optional description for the export. |
Document Options
| Field | Description |
|---|---|
| Filename format – For ZIP and Download | Defines the filename structure for documents inside the export. Users can add one or more field tokens (e.g. Doc_Number) to build the filename. An example of the resulting format is shown below the field. |
| Include Annotations | When checked, annotations added to documents are included in the export. |
| Convert to PDF | When checked, documents are converted to PDF format on export. |
Excel Options
| Field | Description |
|---|---|
| Hyperlink Security | Controls who can access hyperlinks embedded in the exported Excel file. Options: Apply User Security (links respect existing Docwize permissions), Public Within Organisation (links accessible to anyone in the organisation), Public (No sign-in) (links accessible without signing in). |
| Link Type | Controls the type of hyperlinks embedded in the Excel export. Options: No Links, Preview Links (links open the document preview), Download Links (links trigger a download). |
| Include Links to Workflows | When checked, the Excel export includes links to any workflows associated with the documents. |
| Excel Grouping Columns | Optional. Selects one or more columns by which rows in the exported Excel file will be grouped. |
ZIP Package
| Field | Description |
|---|---|
| Include Zipped Files | When checked, the exported documents are packaged into a ZIP archive. |
Footer actions
| Button | Description |
|---|---|
| Set as Default | Saves the current export settings as the default for future exports. |
| Start Export | Initiates the export with the configured settings. |
Search results: additional toolbar options
The following icons are specific to the grid display that is populated after performing a search in Docwize.

Example: Search Results Grid Toolbar
| Field | Description |
|---|---|
 | Back button that enables users to return to the Search page. |
 | Accesses sub-filter to allow users to further refine search results using search aggregations. |
| Detach Previews | Enables users to detach a selected document so that it opens in its own window. For users working on two screens, this option is particularly convenient. When this is clicked on, it enables it. To deactivate this function, click on the button again. |
| Number of hits for 'search term' | Indicates how many search results were identified. |
 | Enables users to save search results, available for access in the Download module. This is particularly helpful when dealing with large sets of results. |
| Row Count | Located in the bottom right corner of the grid, this indicates how many rows of the search results are loaded. |
Document Icons
Each row in the grid will display information pertaining to the document. Some of these are standard for all documents. Some fields are customized and/or only relevant to Search results.
| Field | Description |
|---|---|
 | 'Preview' enables users to view the relevant document. A green dot indicates the document was recently previewed. |
 | Indicates file format (eg. PDF, email, etc.) |
 | This is visible for search results. It gives a weighted scoring of the relevance of the document to the search criteria. |
 | Some documents may have a vertical paperclip icon. This indicates that this is a main document with attachments. |
 | Some documents may have a horizontal paperclip icon. This indicates that this is an attachment, connected to a main document. |
Right-click document options
If users right-click on any document found in the grid display, a menu of options will appear.

'Right-click' menu options
| Field | Description |
|---|---|
| Copy Cell Text | Enables users to copy the content in the cell. |
| Preview in new window | Enables users to view the selected document in its own window. |
| Document details | Accesses the Document details dialog. |
| Attachments | Accesses the Attachments dialog to view attachments. Note: the first document listed in the Attachments dialog is the main document. |
| Workflows | Accesses the Workflow dialog, enabling users to send the document to a chosen workflow. |
| File Versions | Accesses the File Versions dialog to view file version history and/or add a new file version. |
| Action Requests | Accesses the Action Request dialog to create an action request on the document. |
| Permissions | Accesses the Permissions dialog to view current permissions and/or change permissions pertaining to the document (dependent on permission settings). |
| Link | Enables users to select an option for downloading a link to the document, which can be shared with others/stored for later access. |
| Delete | Enables users to delete the document (dependent on permission settings). |