Locations
A location links documents to a place: a physical place, such as a site, a building and a floor, or a step in a work breakdown structure (WBS), such as a project code and its phases. Locations can sit inside other locations to any depth, so the Locations tab of Explorer can mirror how your projects are actually organised. Open a location to see the documents that belong to it, or to everything under it.
What you can do in Locations
- Find a location by name
- Open a location and see its documents, including those of its sub-locations
- Create locations and sub-locations
- Rename a location or change its code
- Delete a location you no longer need
The Locations tab
The location tree lists the top-level locations. Locations that contain sub-locations have an arrow on their left.
| Item | Description |
|---|---|
| Search Locations | Finds a location by name. |
| Create New Location | Creates a top-level location. See How to create a location. |
| Arrow on the left of a location | Shows or hides its sub-locations. |
| Location name | Opens the location in the grid on the right, replacing what the current tab shows. |
| Arrow on the right of a location | Opens the location in a new tab, so you can keep the current one open. |
Working in an open location
An open location lists its sub-locations first, then the documents linked to that location itself. The icon at the start of each row shows which is which, a location pin or the document's file type, and the Type column reads Location for a sub-location. The Doc Grid features work here as they do elsewhere, and the toolbar has the same Assign and Export buttons as an open folder (see Folders).
Recursive also lists the documents linked to every sub-location, at all levels, so you can see everything under a location in one list. Select it again to list only the location's own documents.
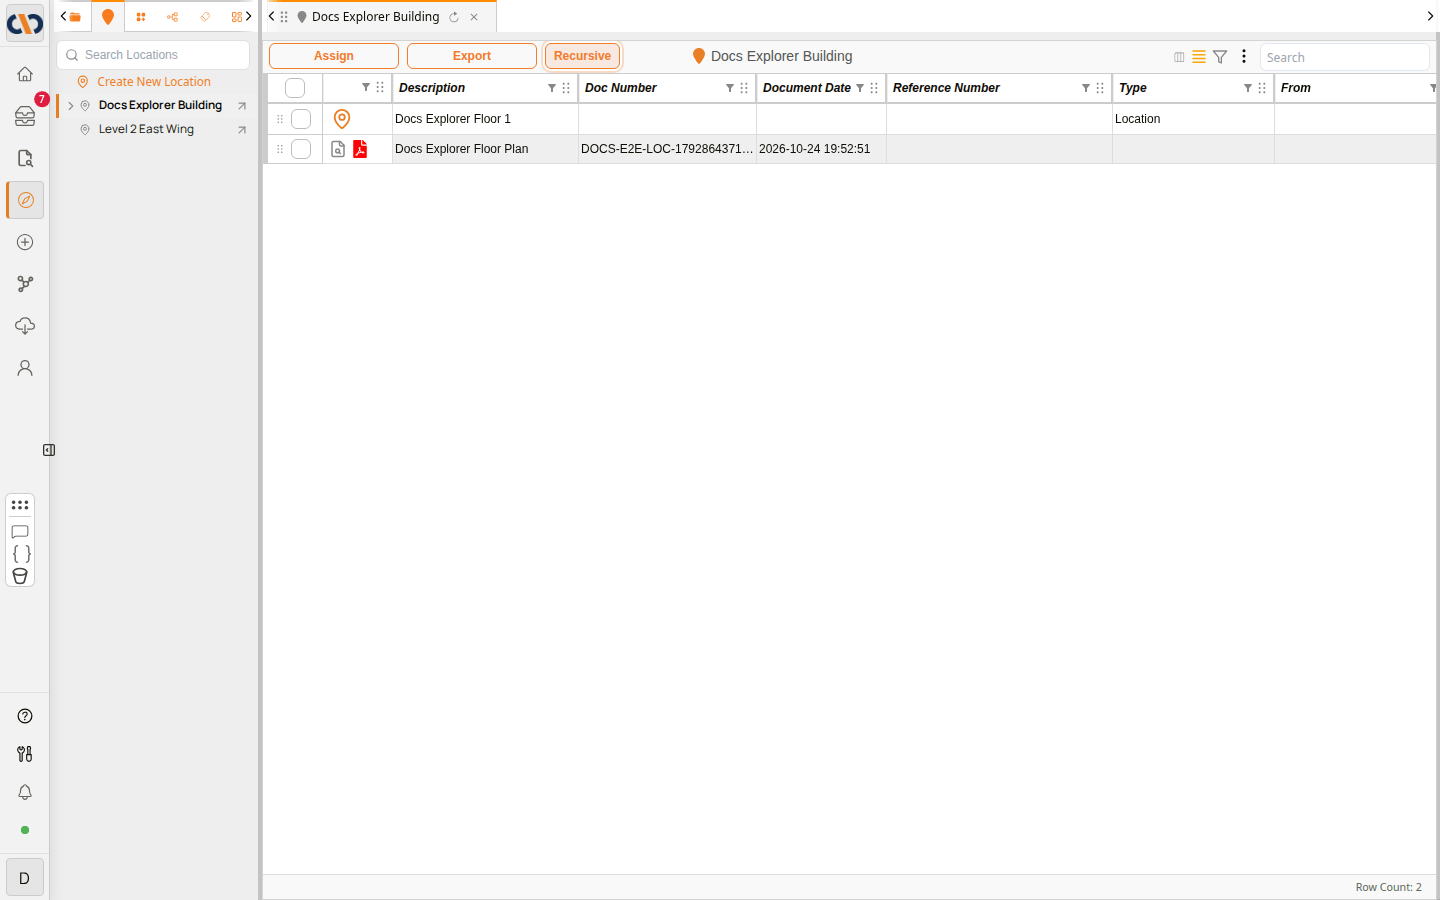 An open location, with Recursive on
Right-click options
Right-click a location in the tree for the actions you can take on it.
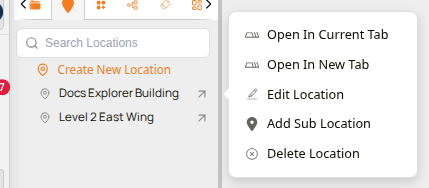 The location right-click menu
| Option | Description |
|---|---|
| Open In Current Tab | Opens the location in the current tab. |
| Open In New Tab | Opens the location in a new tab. |
| Edit Location | Changes the location's name or code. See How to rename a location. |
| Add Sub Location | Creates a location inside this one. See How to add a sub-location. |
| Delete Location | Deletes the location. See How to delete a location. |
How to create a location
Create a location when documents need to be linked to a new place, for example a new site or project phase.
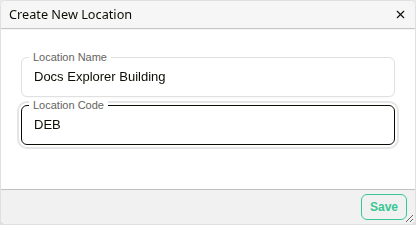 Creating a location
| Step | Description |
|---|---|
| 1 | In Explorer, select the Locations tab. |
| 2 | Select Create New Location at the top of the location tree. |
| 3 | Type the location's name in Location Name, and its code in Location Code if your organisation uses codes. Save becomes available once the location has a name. |
| 4 | Select Save. The location appears in the tree. |
The video below creates a location, then adds a sub-location to it (see How to add a sub-location).
Example: Creating a Location and a Sub-location
How to add a sub-location
Sub-locations break a location down, for example a building into floors, or a project code into its WBS phases.
| Step | Description |
|---|---|
| 1 | Right-click the location the sub-location belongs to, and select Add Sub Location. |
| 2 | Type the sub-location's name in Location Name, and its code in Location Code if needed. |
| 3 | Select Save. The sub-location is created inside the location you right-clicked. |
How to rename a location
| Step | Description |
|---|---|
| 1 | Right-click the location and select Edit Location. |
| 2 | Change the name in Location Name, or the code in Location Code. |
| 3 | Select Save. The tree shows the new name. |
How to delete a location
A location that still has sub-locations cannot be deleted: Docwize tells you so. Delete its sub-locations first, starting from the lowest level.
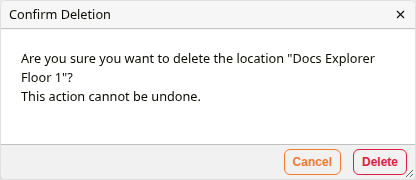 Confirming a location deletion
| Step | Description |
|---|---|
| 1 | Right-click the location and select Delete Location. |
| 2 | In Confirm Deletion, select Delete. The location is removed from the tree. Deleting a location cannot be undone. |