Transmittals
A transmittal is a cover document that formally records which drawings or documents were issued, and to whom. Transmittals are common in architecture, engineering and construction, where every issue of a drawing needs a record. In Docwize, a transmittal is a document in its own right, with the drawings and documents it covers linked to it.
The Transmittals section of Document Details shows these links. Open it by selecting Transmittals in the vertical toolbar of the Document Details dialog.
What you can do in Transmittals
- Add drawings and documents to a transmittal
- See which drawings and documents a transmittal covers
- See which transmittals a drawing has been issued on
- Remove a drawing or document from a transmittal
- Generate the transmittal document from a template
- Send the transmittal to the people who need it
How transmittals work
Issuing drawings on a transmittal usually follows four steps:
- Create the transmittal. A transmittal is a document whose document type an administrator has set up as a transmittal type. Create it as you would any other document. See Upload/Create New Docs.
- Add the drawings. Link each drawing or document that is being issued to the transmittal. See How to add documents to a transmittal.
- Generate the transmittal document. Docwize fills a transmittal template with the transmittal's details and its list of drawings, and saves the result as the transmittal's file. See How to generate a transmittal.
- Send the transmittal. See How to send a transmittal.
The video below shows steps 2 and 3: adding two drawings to a transmittal, then generating the transmittal document.
Example: Preparing a Transmittal
The Transmittals section
What the Transmittals section shows depends on the document.
On a transmittal, the section is titled Drawings/Documents On This Transmittal, and lists every drawing and document the transmittal covers.
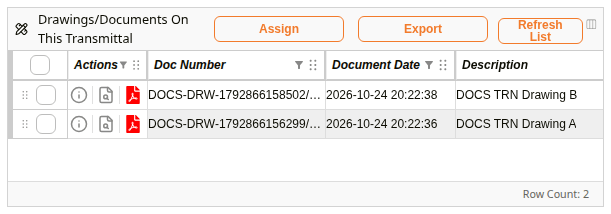
Drawings on a transmittal
On any other document, such as a drawing, the section is titled Transmittals, and lists the transmittals the document has been added to. This lets you see each time a drawing was issued.

The transmittals a drawing is on
Both lists have the same controls:
| Control | Description |
|---|---|
| Assign | Assigns all the listed documents, or only the ones you have ticked, for example to a folder or tag. |
| Export | Exports all the listed documents, or only the ones you have ticked. |
| Refresh List | Reloads the list. |
| Actions | The icons in each row open the document's details, preview it, or download it. |
The other columns show each document's details, such as its Doc Number, Description and Type.
How to add documents to a transmittal
You add drawings and documents to a transmittal from Explorer, while the transmittal's Document Details is open. Adding a document needs the Review Document permission.
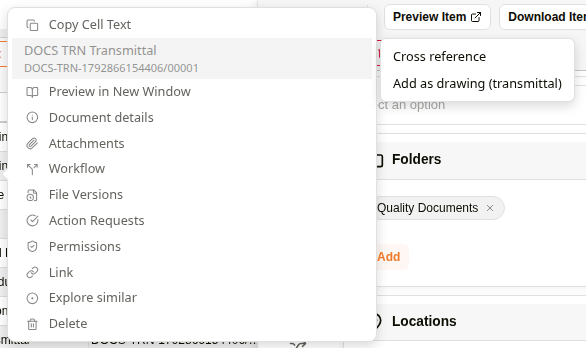
Adding a drawing to the open transmittal
| Step | Description |
|---|---|
| 1 | Open the transmittal's Document Details and leave it open. Drag the window to one side so you can see the Explorer list next to it. |
| 2 | In Explorer, right-click the drawing or document you want to add. |
| 3 | The right-click menu has an extra item at the very top: the open transmittal, shown by its description and document number. Point to that item, without clicking. A second menu opens beside it, with Cross reference and Add as drawing (transmittal). |
| 4 | Click Add as drawing (transmittal) in that second menu. The document is linked to the transmittal straight away, and appears in its Drawings/Documents On This Transmittal list. |
| 5 | Repeat for each drawing or document the transmittal covers. |
How to remove a document from a transmittal
Remove a document when it was added to the wrong transmittal, or is no longer being issued.
| Step | Description |
|---|---|
| 1 | Open the transmittal's Document Details and select Transmittals. |
| 2 | Right-click the document's row and click Remove selected drawing from this Transmittal. |
| 3 | Docwize asks you to confirm. Click Confirm. The document is removed from the list. |
How to generate a transmittal
Generating the transmittal produces the transmittal document itself: a document made from a transmittal template, filled in with the transmittal's details and its list of drawings. The generated document becomes the transmittal's file. Transmittal templates are set up by an administrator. See Word Templates.
You generate a transmittal from Recent Activity, in the New module.
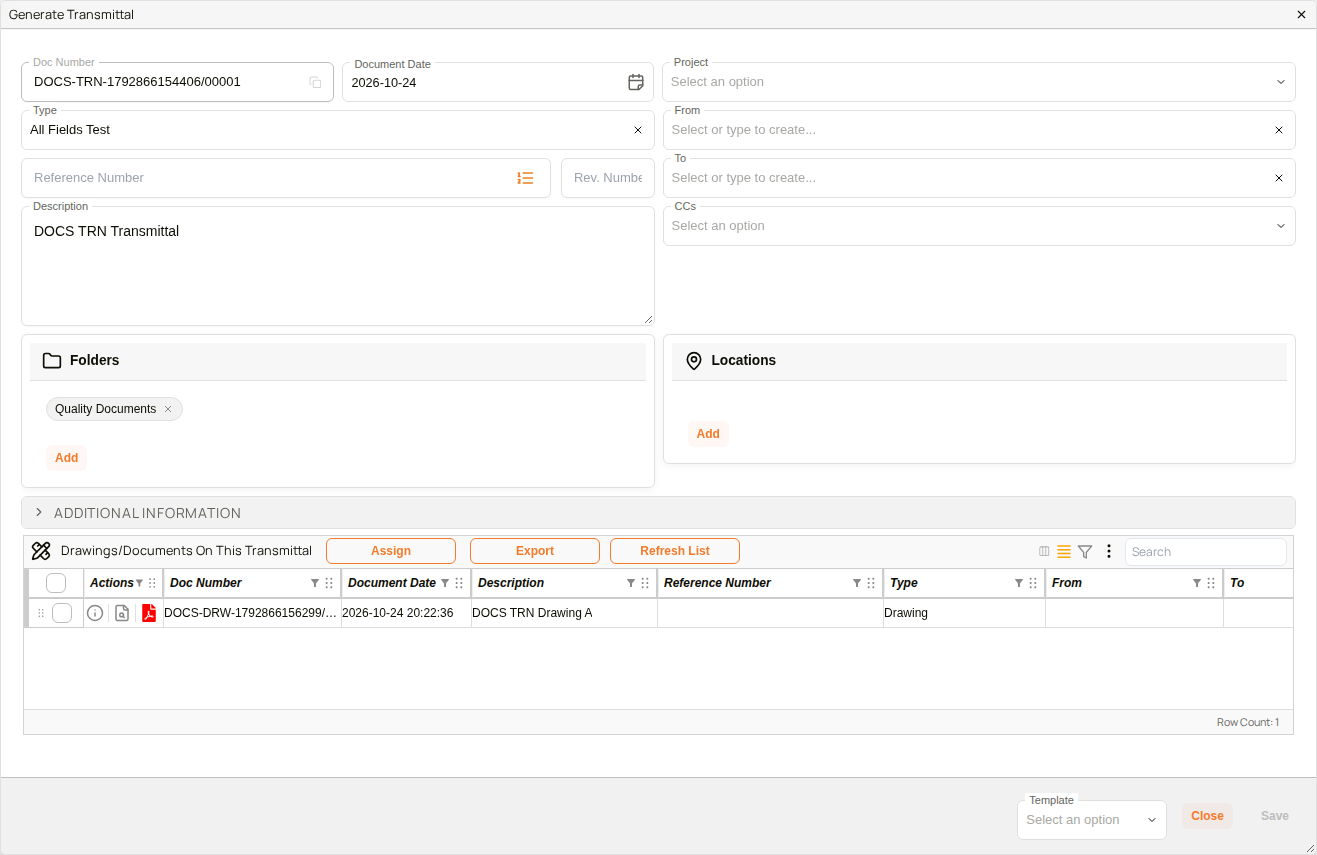
'Generate Transmittal' dialog
| Step | Description |
|---|---|
| 1 | Go to New and open Recent Activity. |
| 2 | In the transmittal's row, click Send, then click Generate Transmittal. This option is only offered for transmittals. |
| 3 | The Generate Transmittal dialog shows the transmittal's details and the drawings on it. Check them before you generate. |
| 4 | Choose a Template at the bottom of the dialog. |
| 5 | Click Save. When the transmittal is ready, the dialog shows Transmittal Generated. |
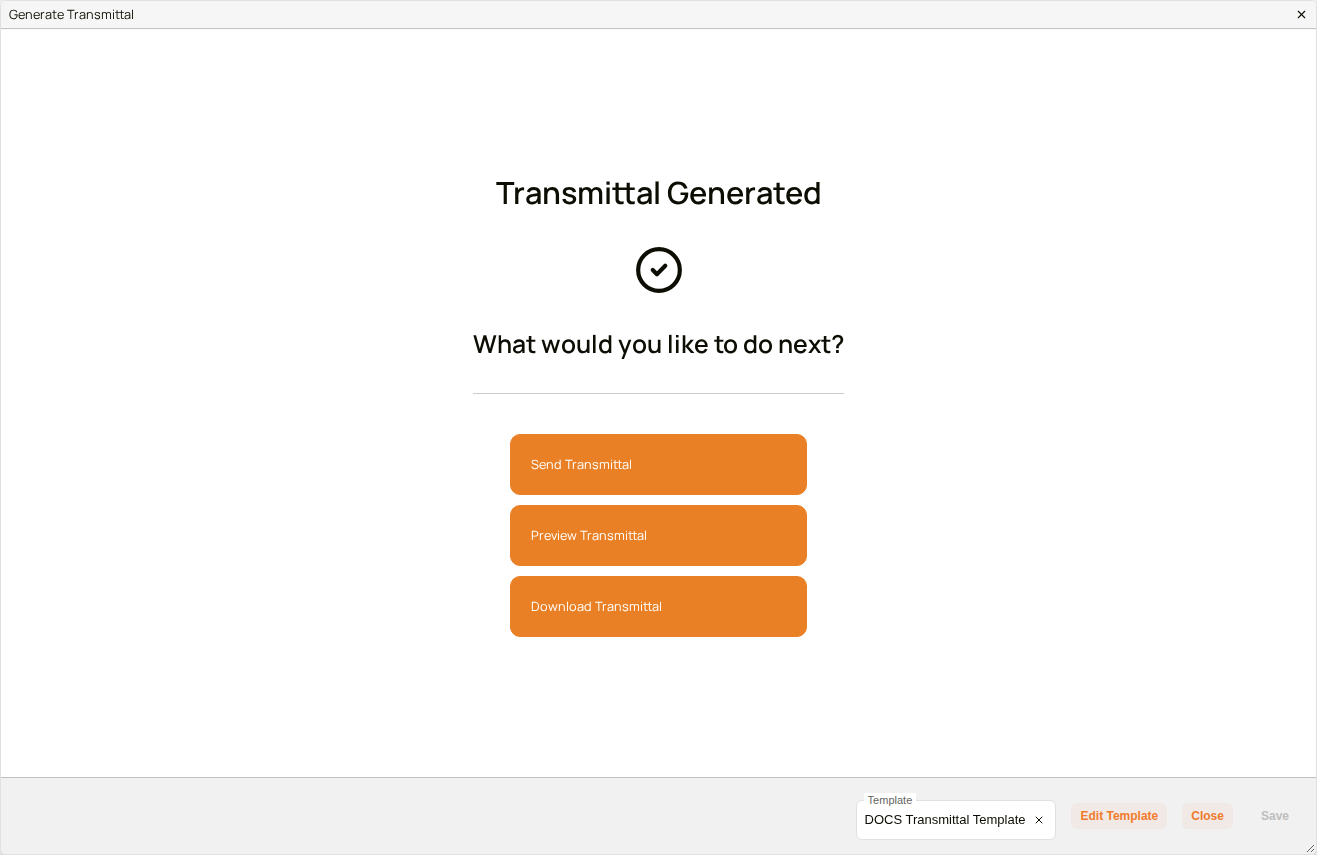
Transmittal generated
| Option | Description |
|---|---|
| Preview Transmittal | Opens the generated transmittal in a new tab. |
| Download Transmittal | Downloads the generated transmittal. |
How to send a transmittal
Once it is generated, send the transmittal from its Distribution section: add the recipients and click Send to Distribution Queue. Each recipient receives an email with a link to download it. See Distribution.